My BlogGing
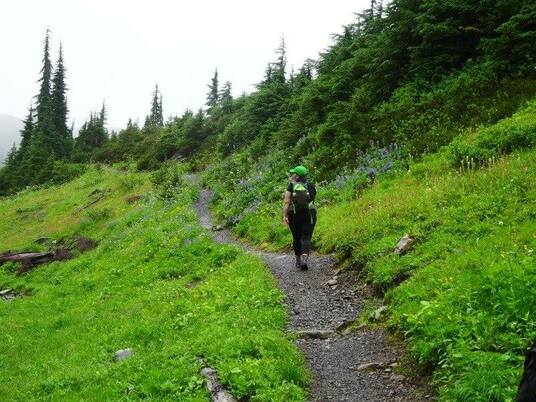
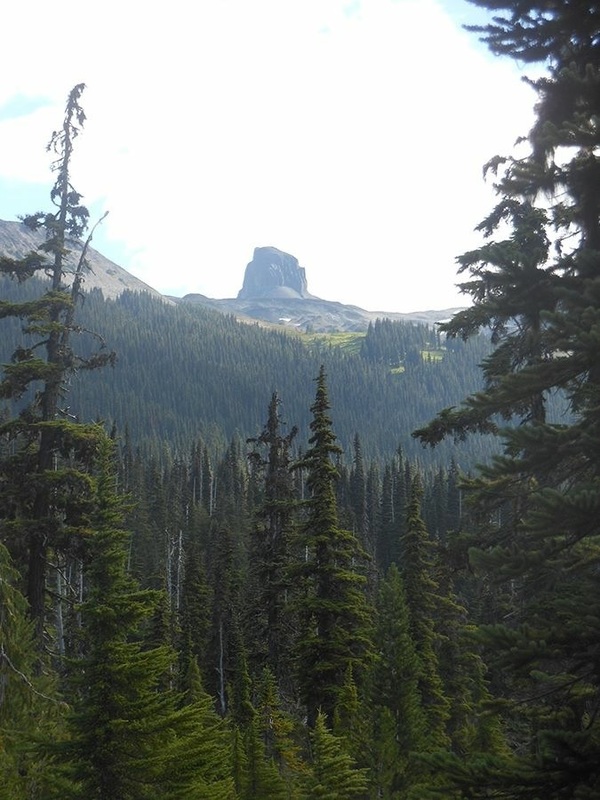
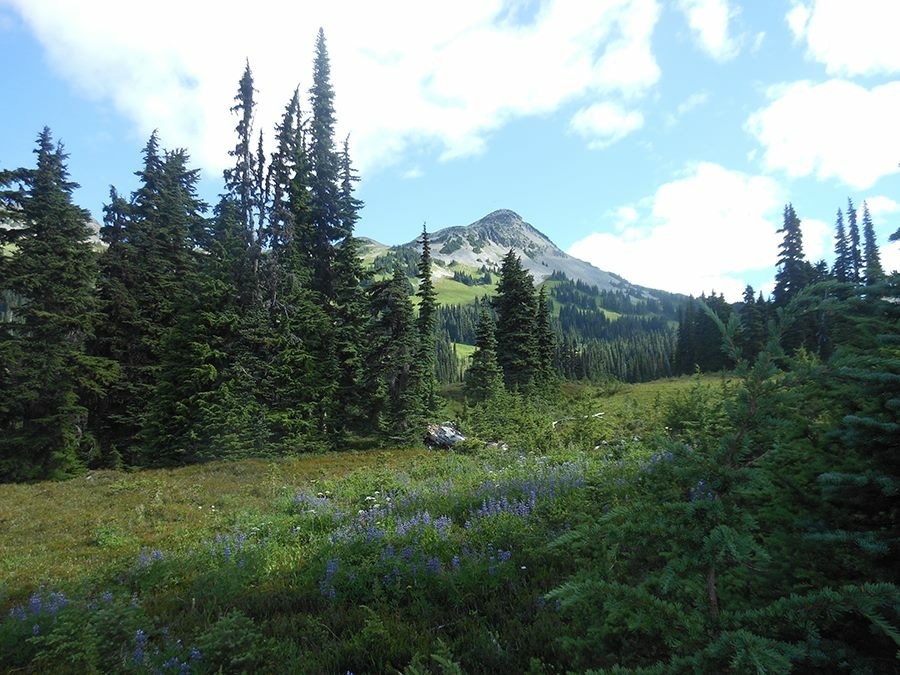
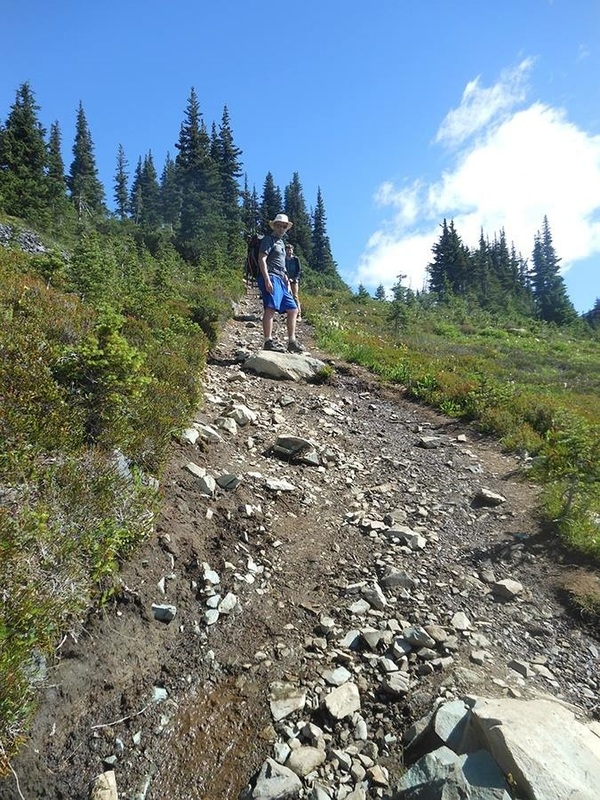
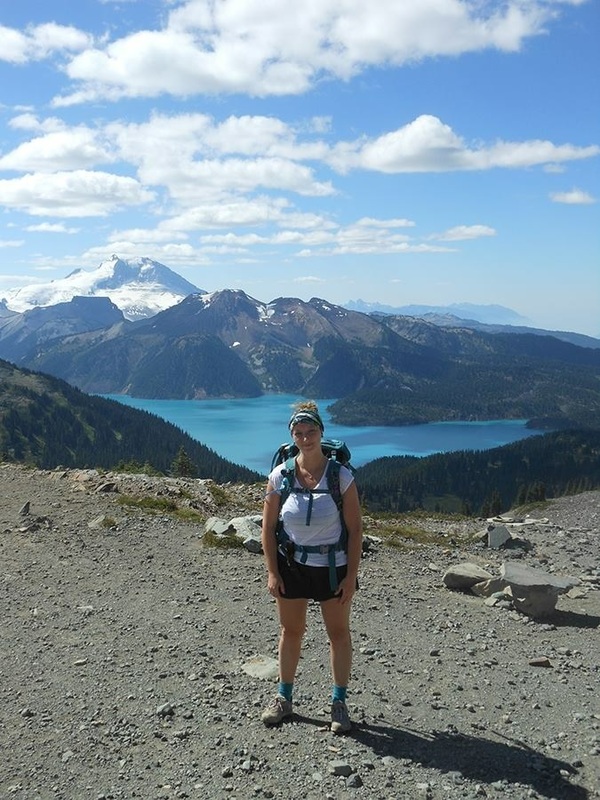
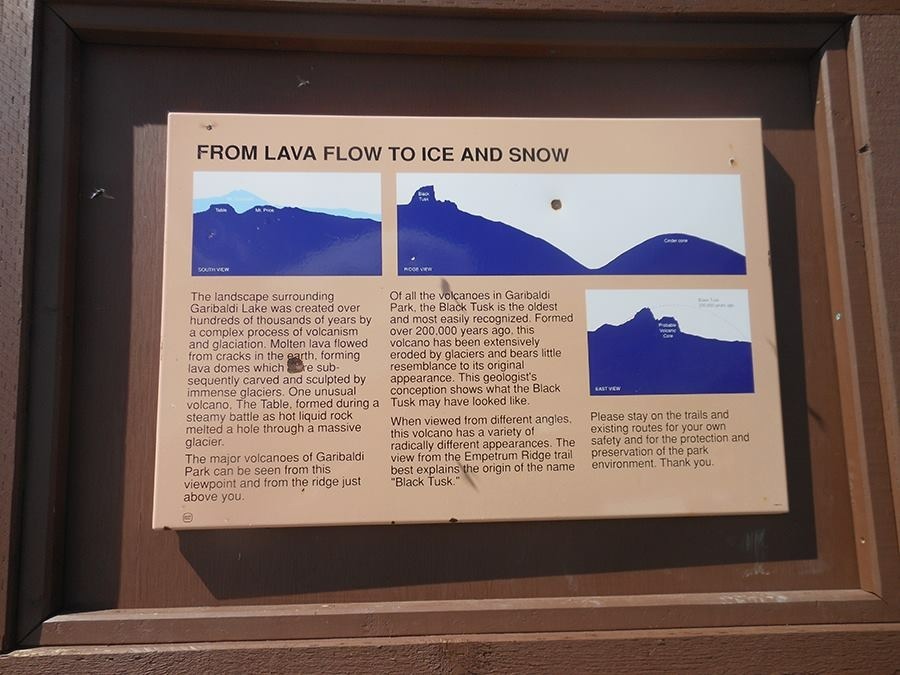
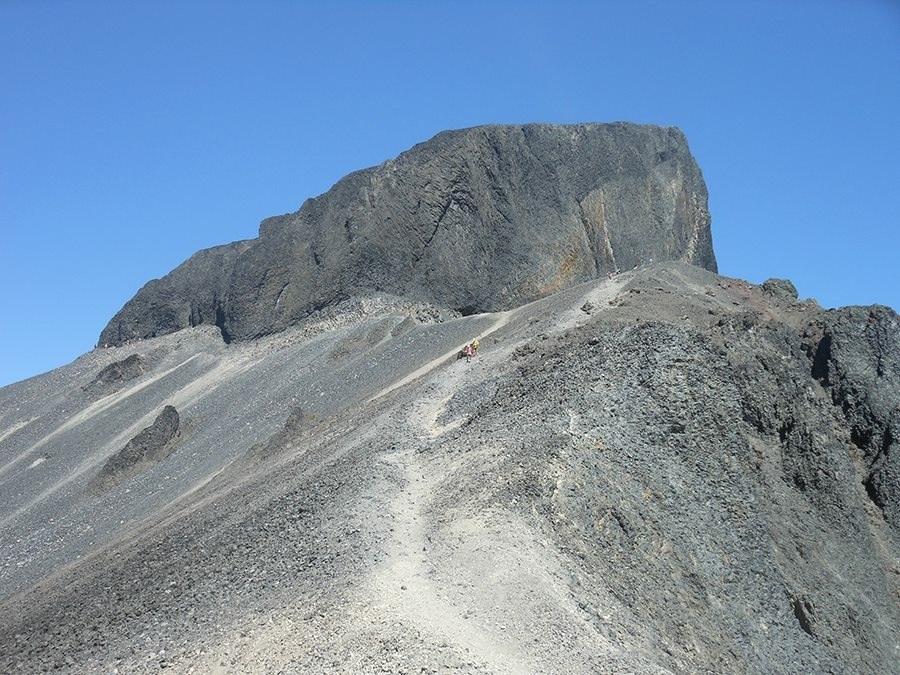
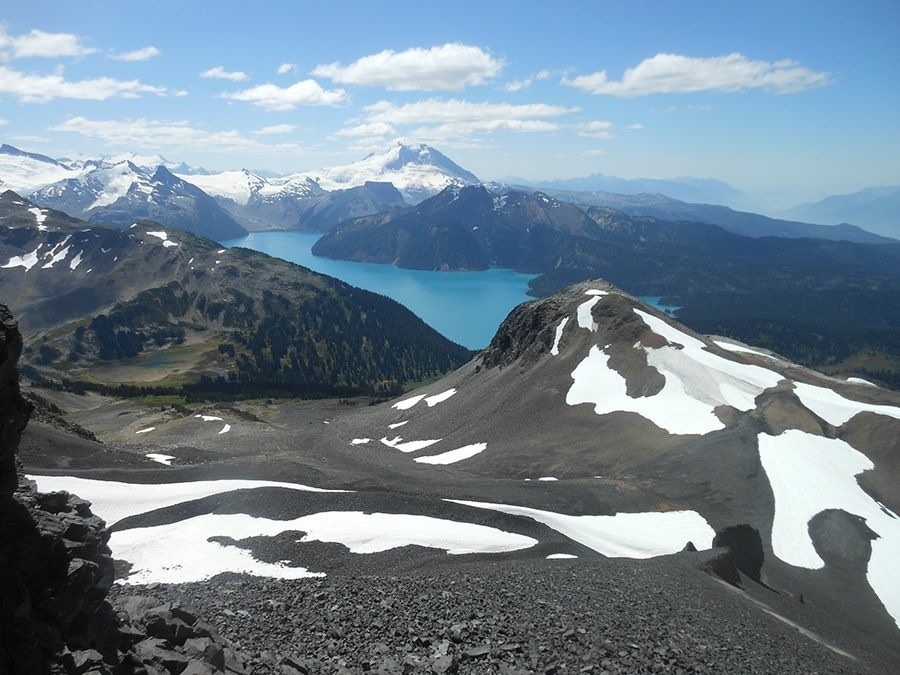
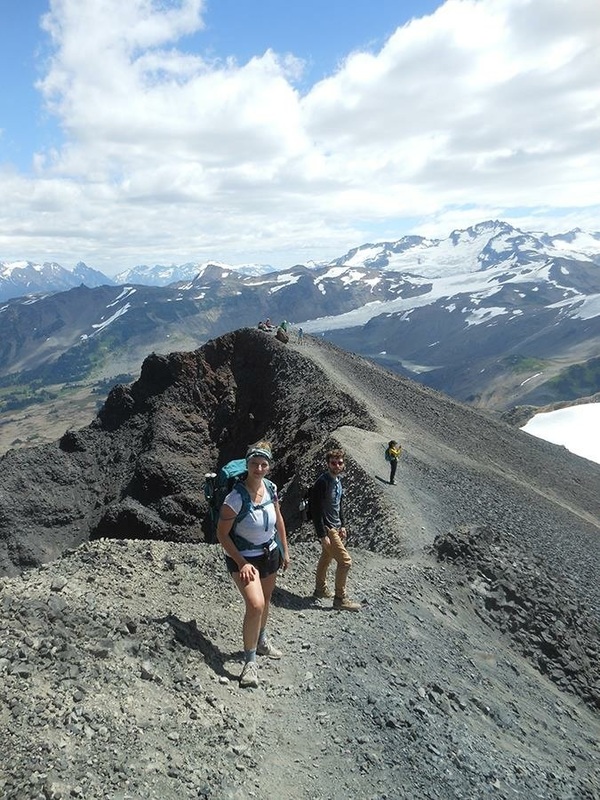
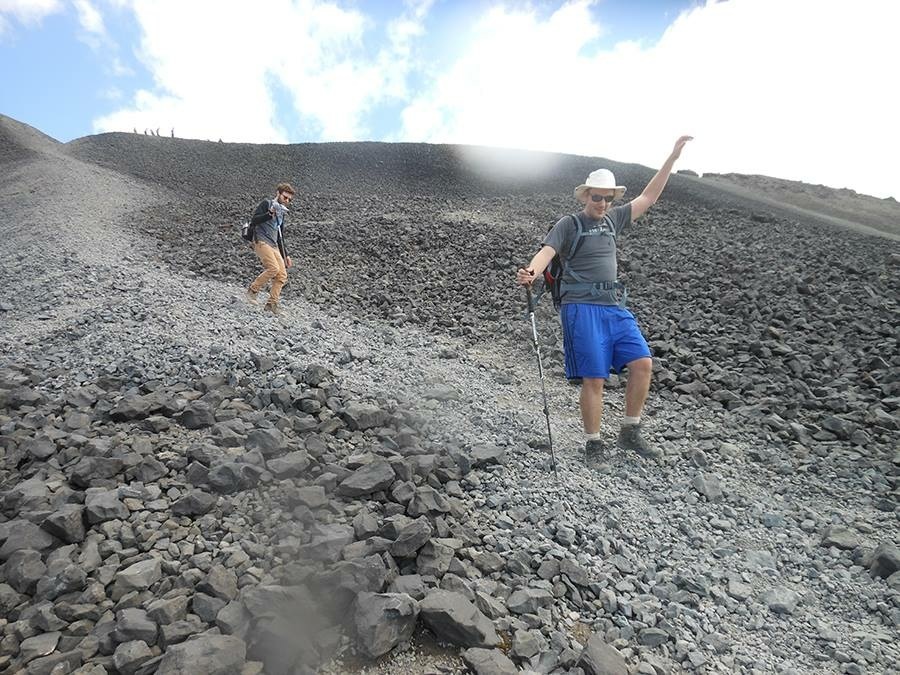
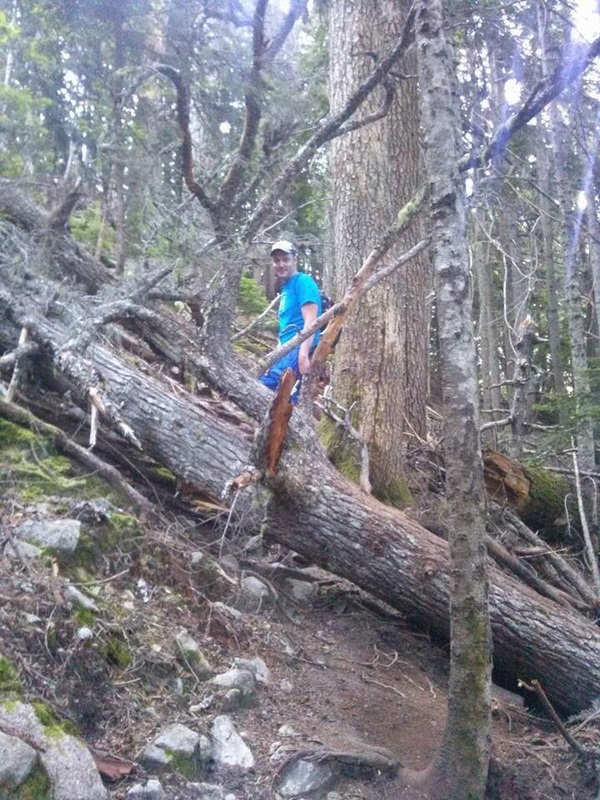
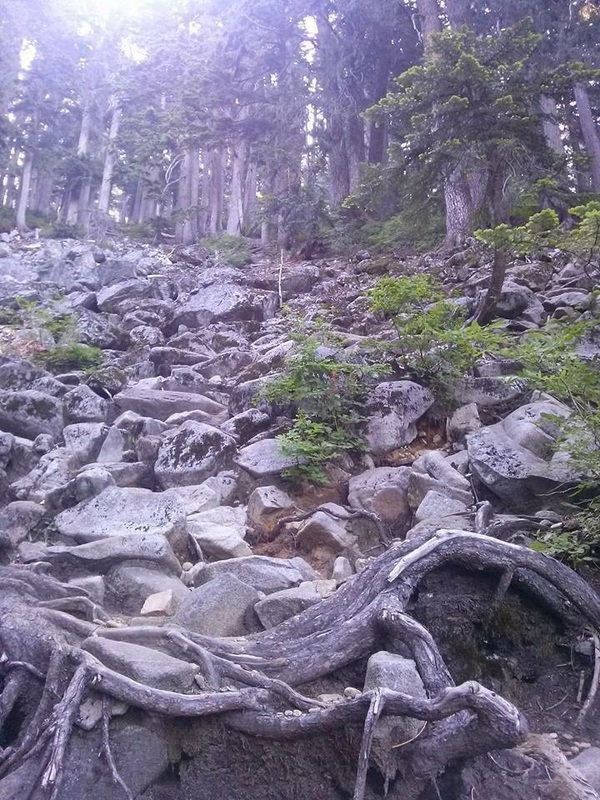
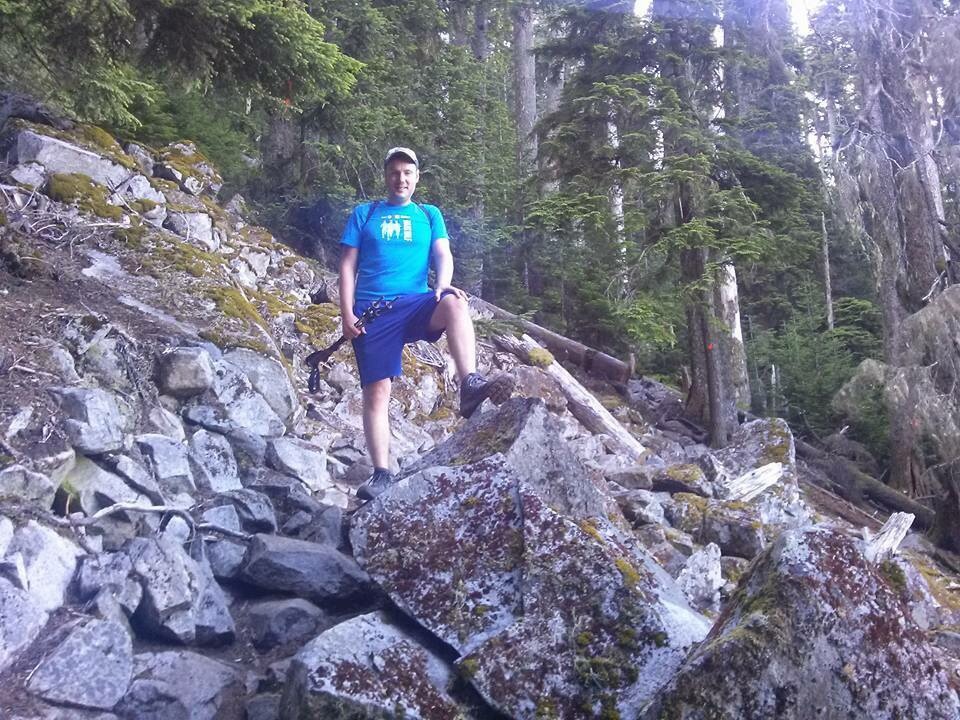
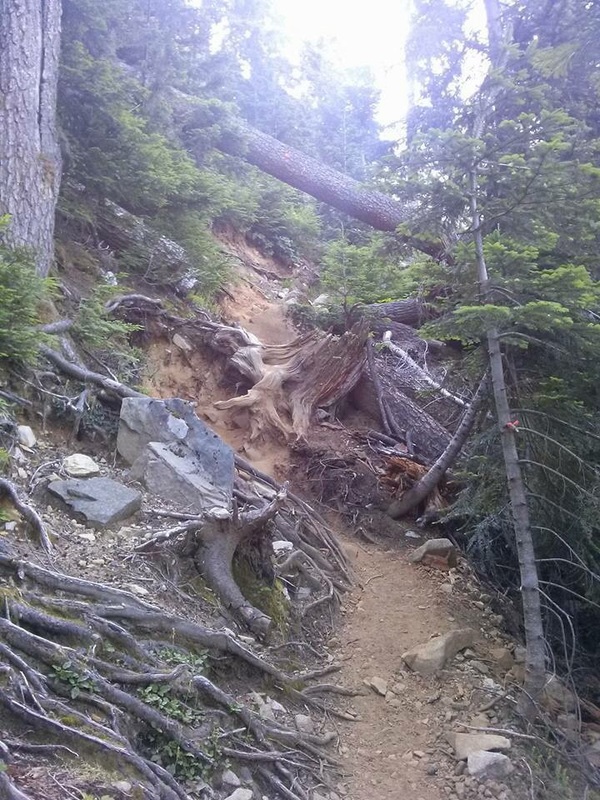
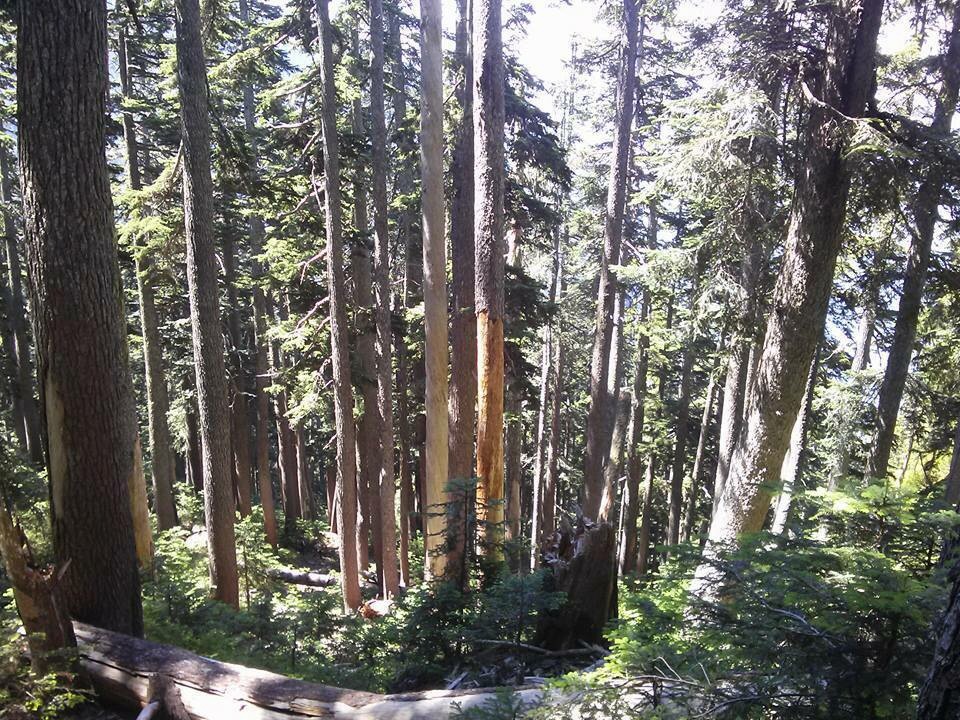
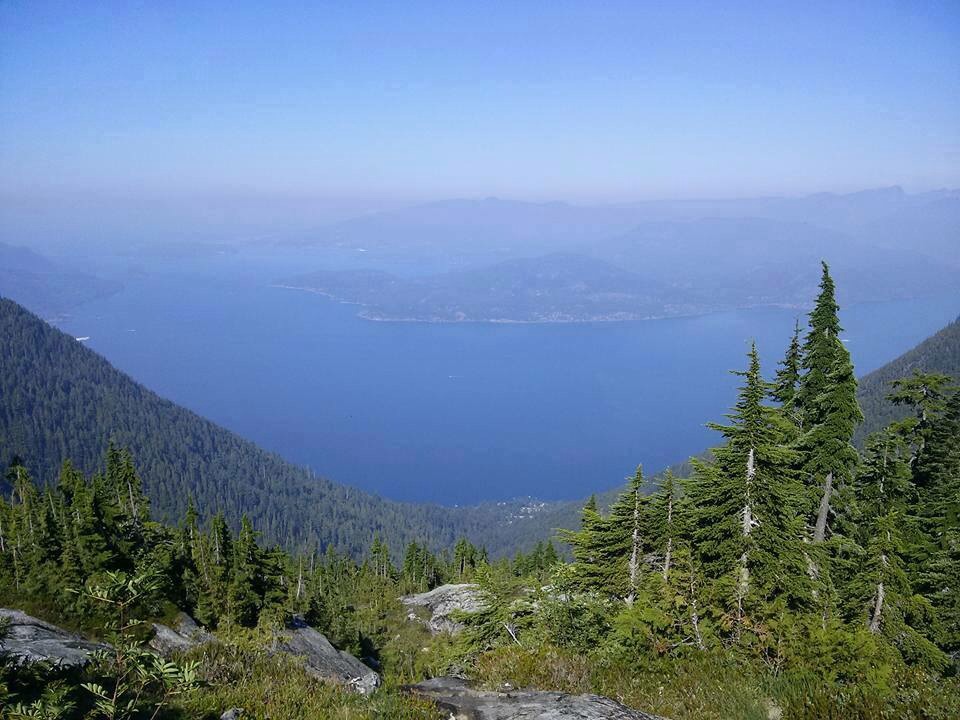
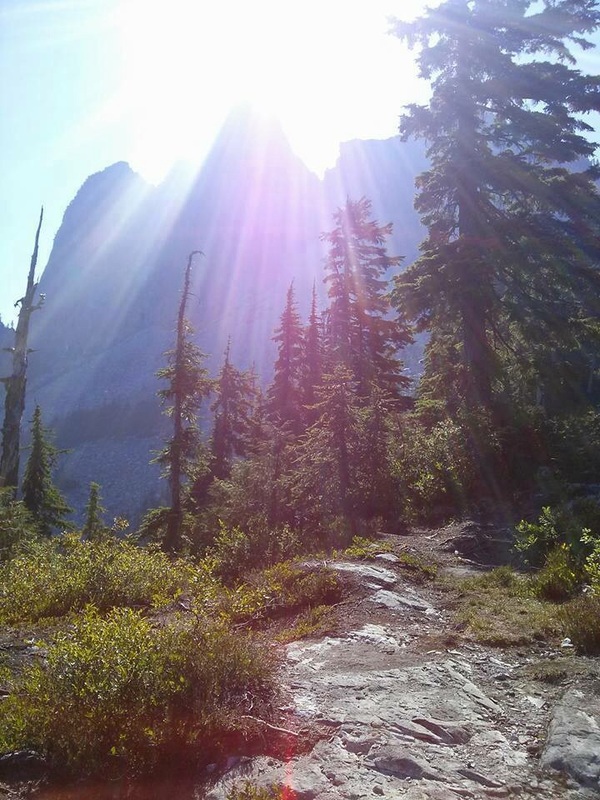
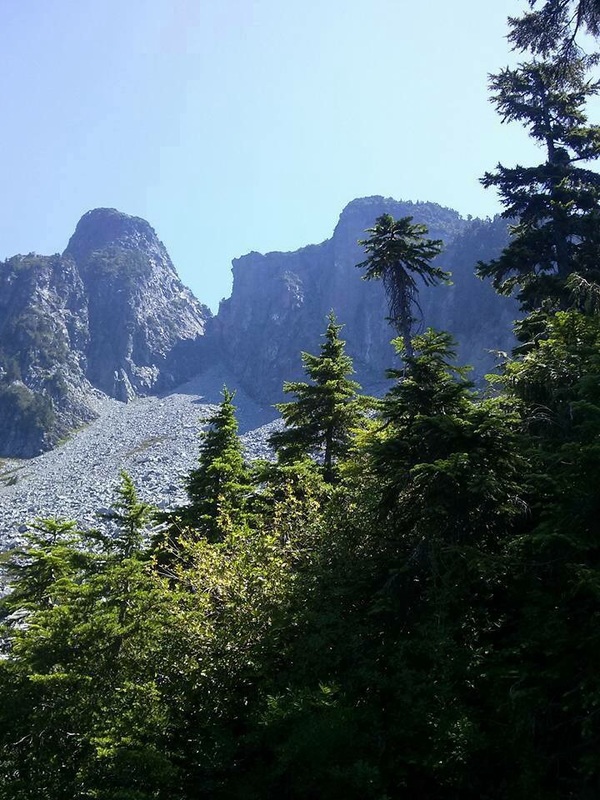
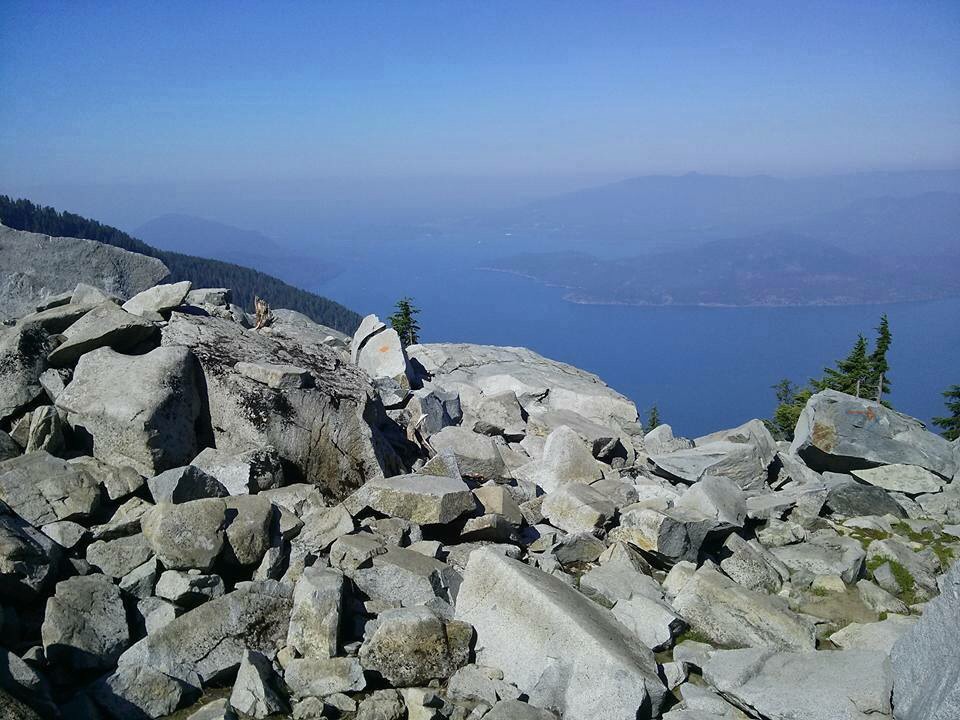
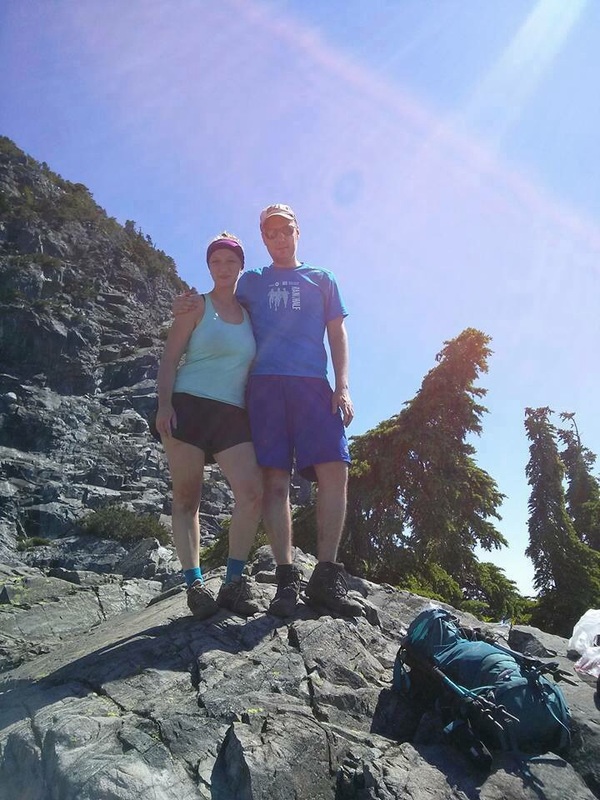
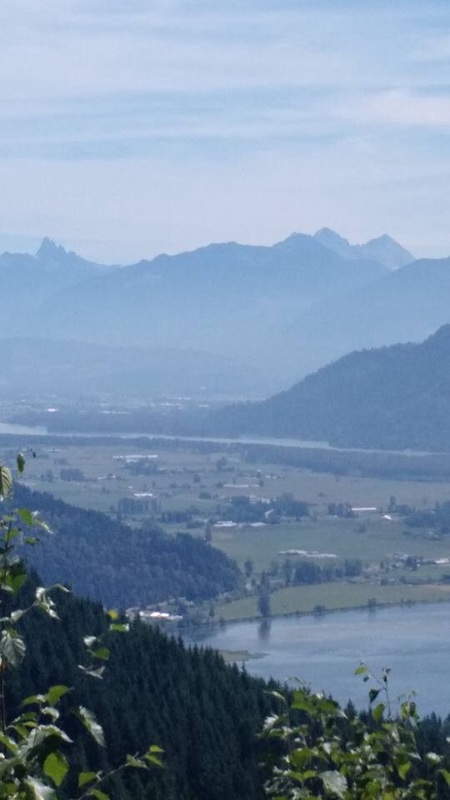
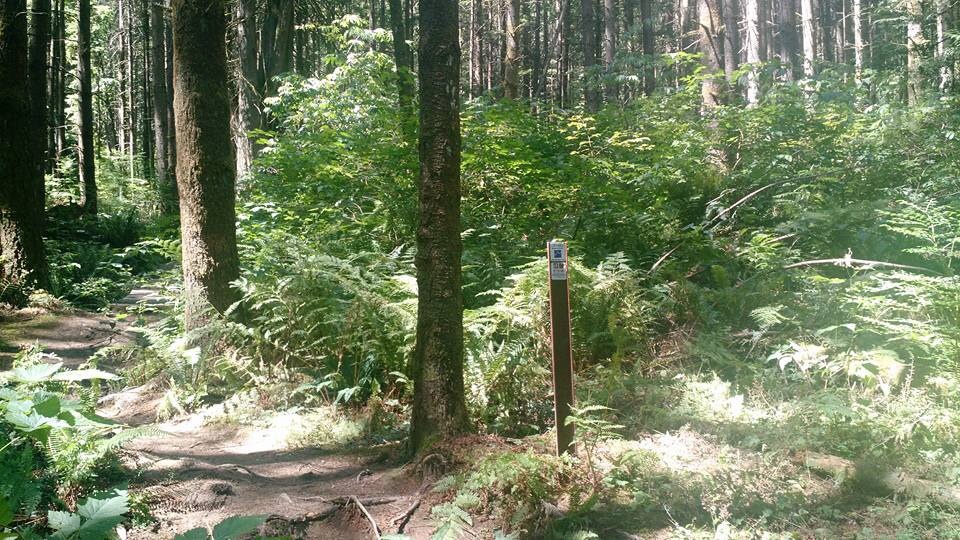
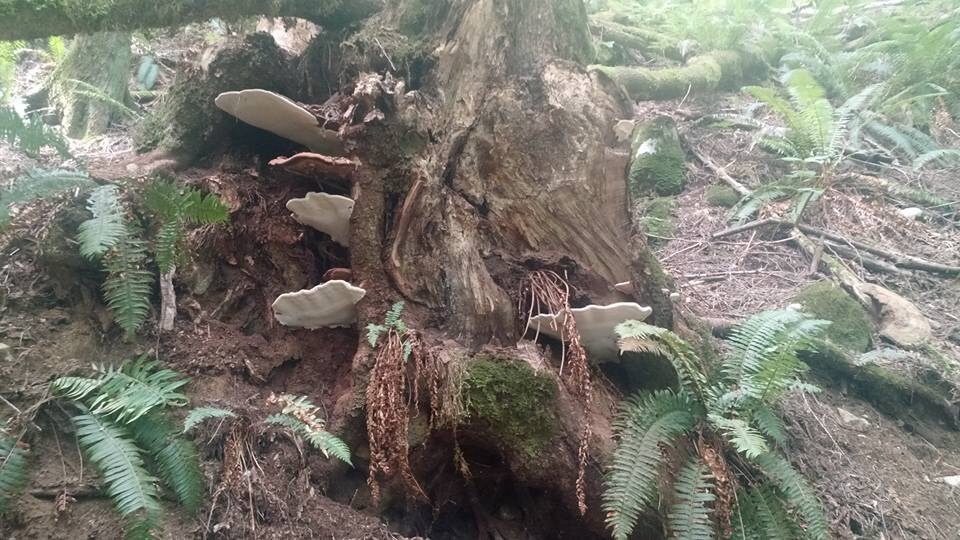
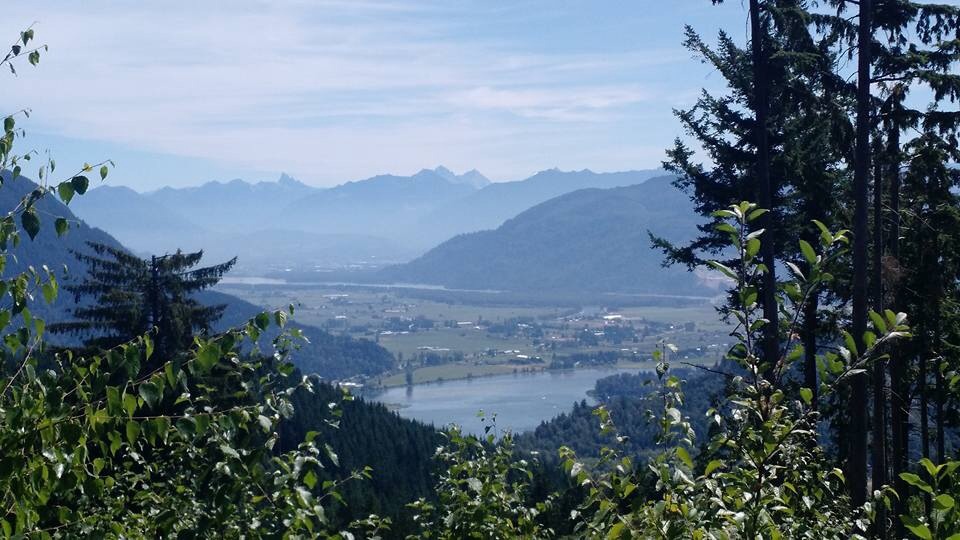
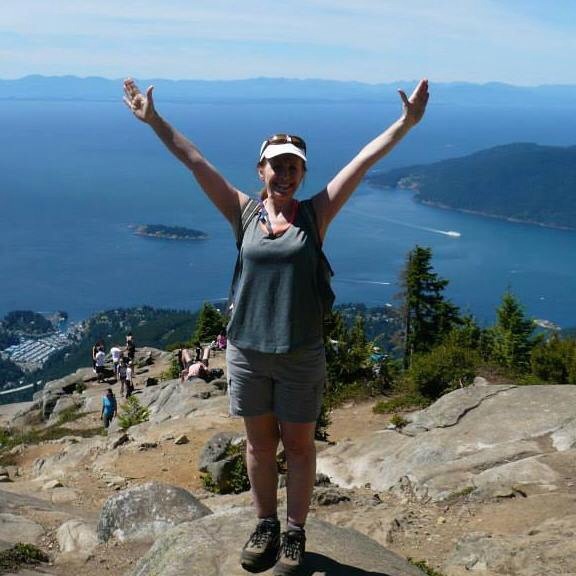
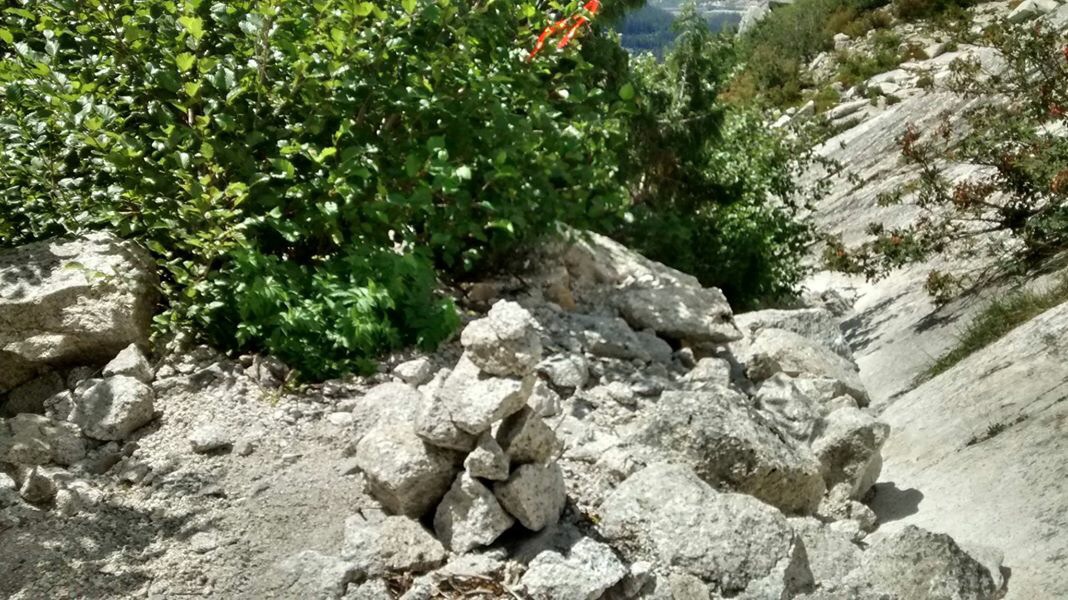
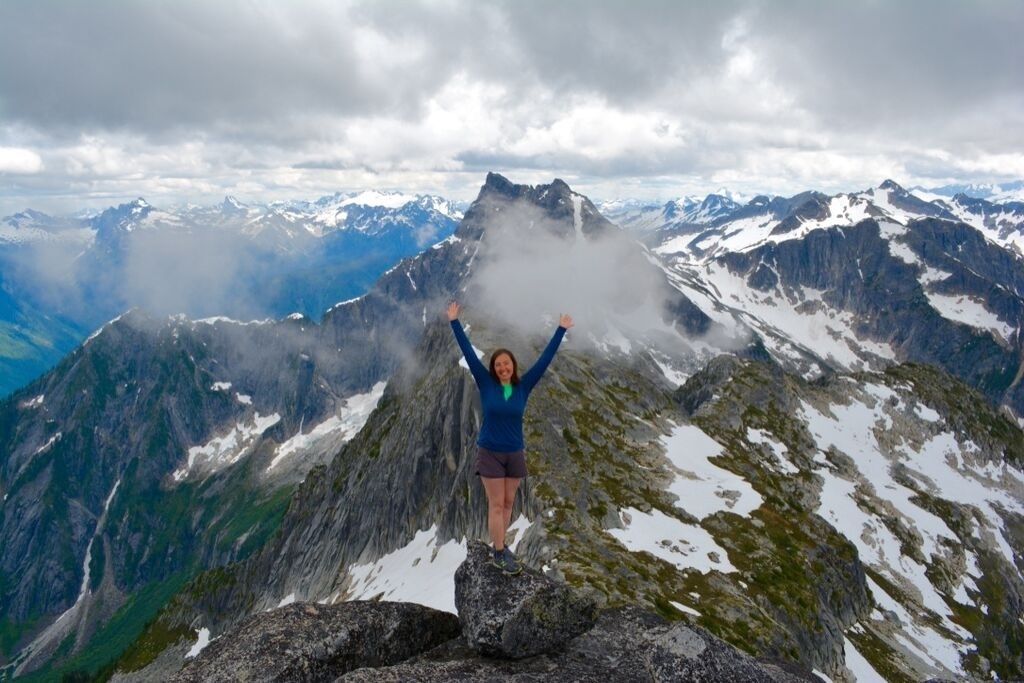
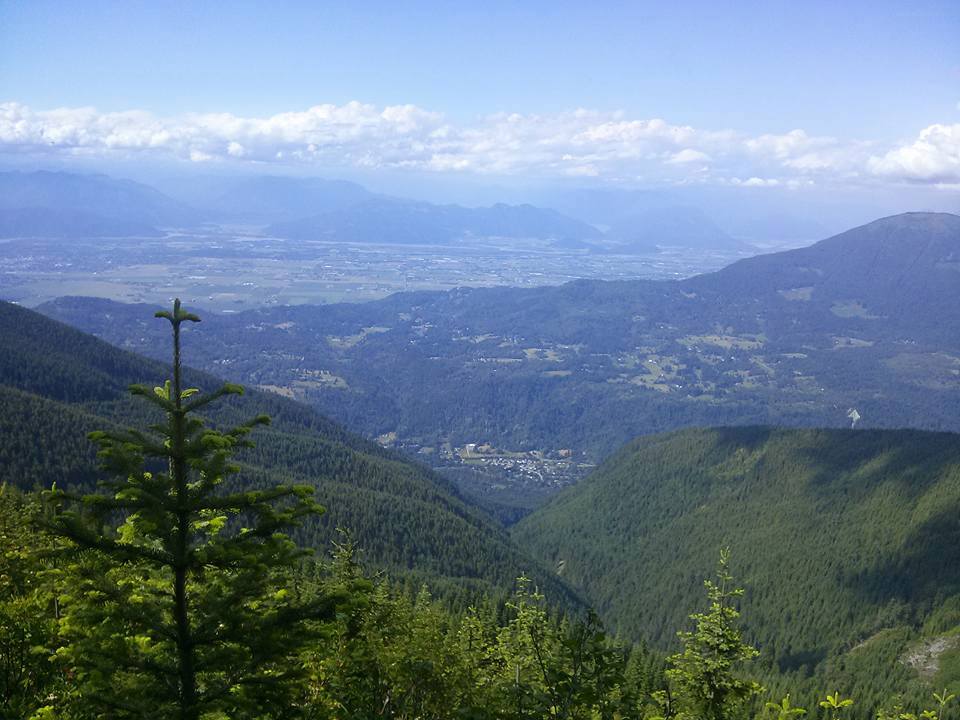
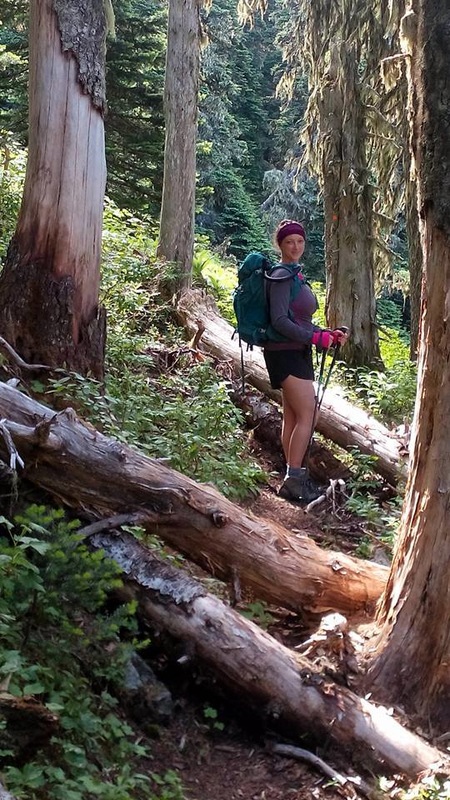
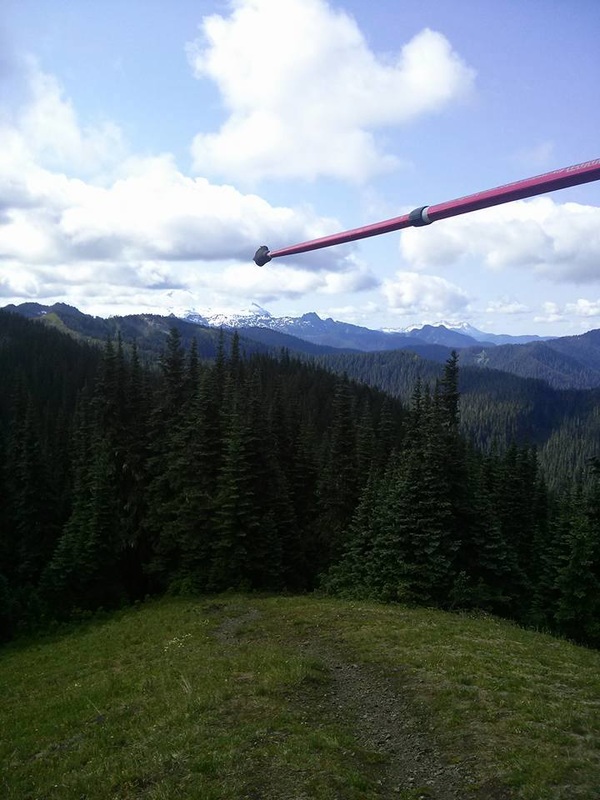
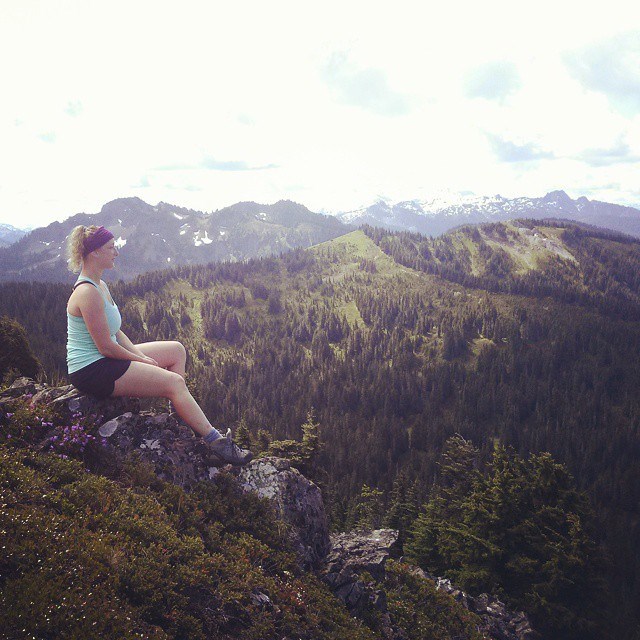
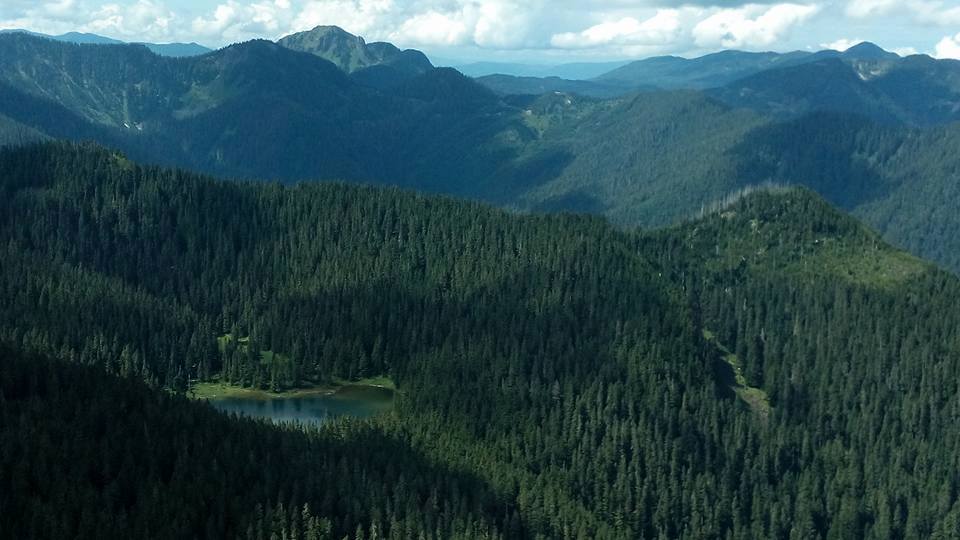
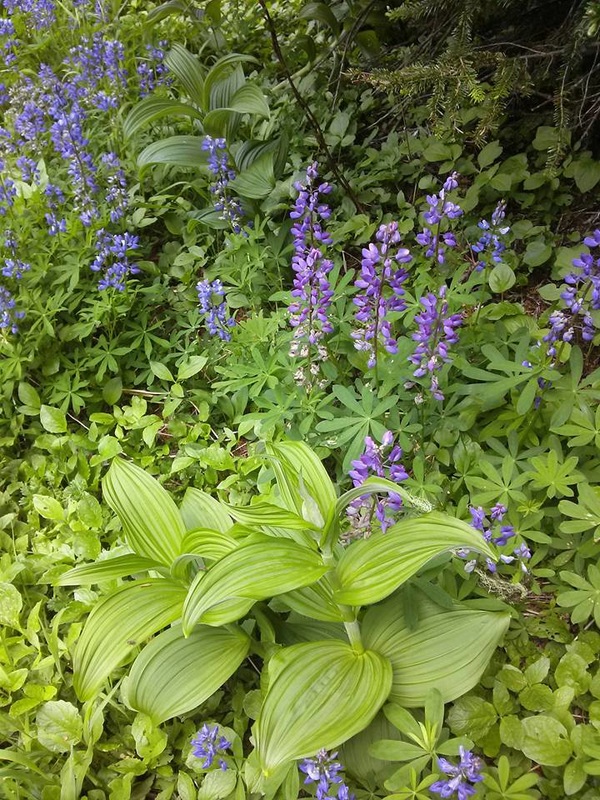
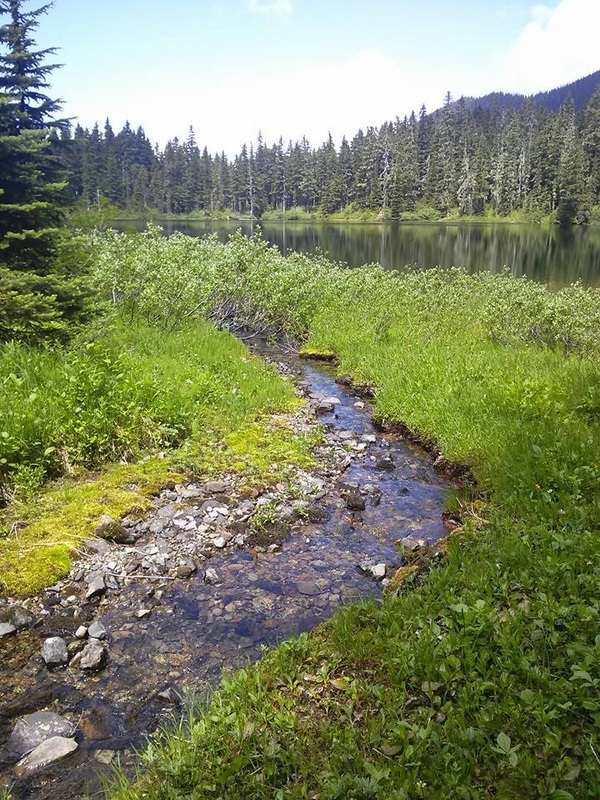
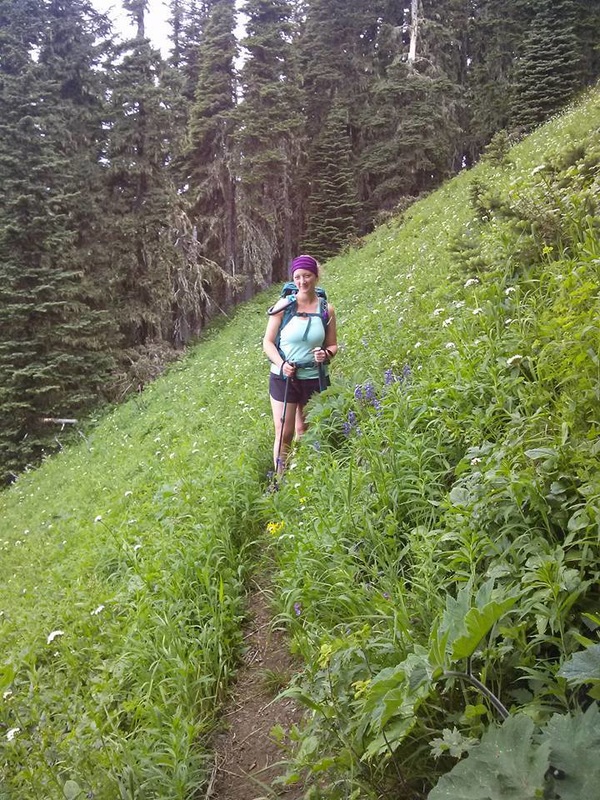
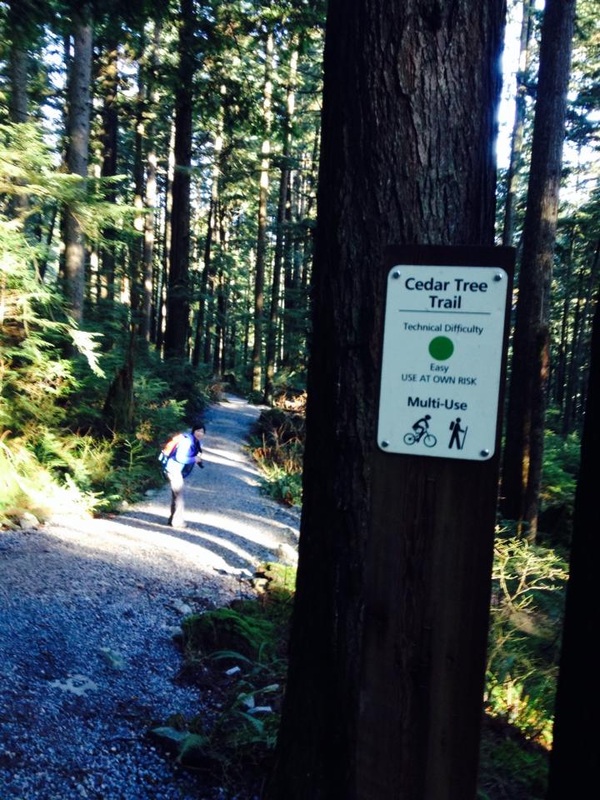
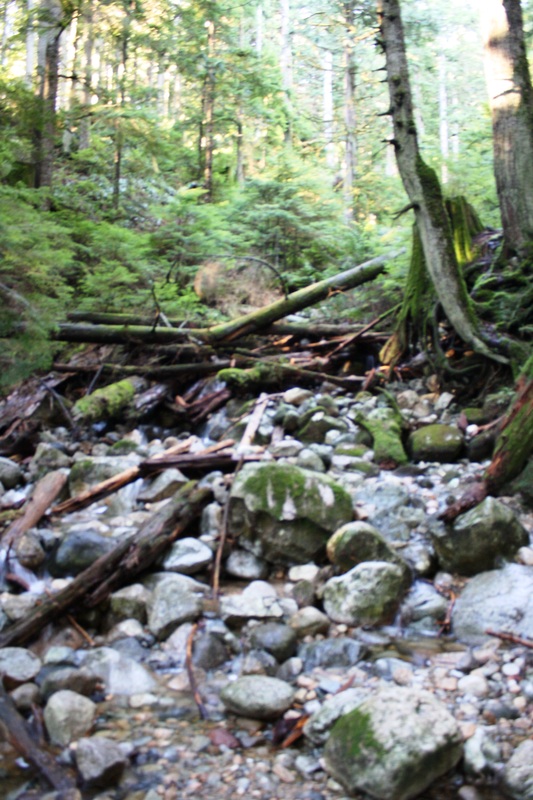
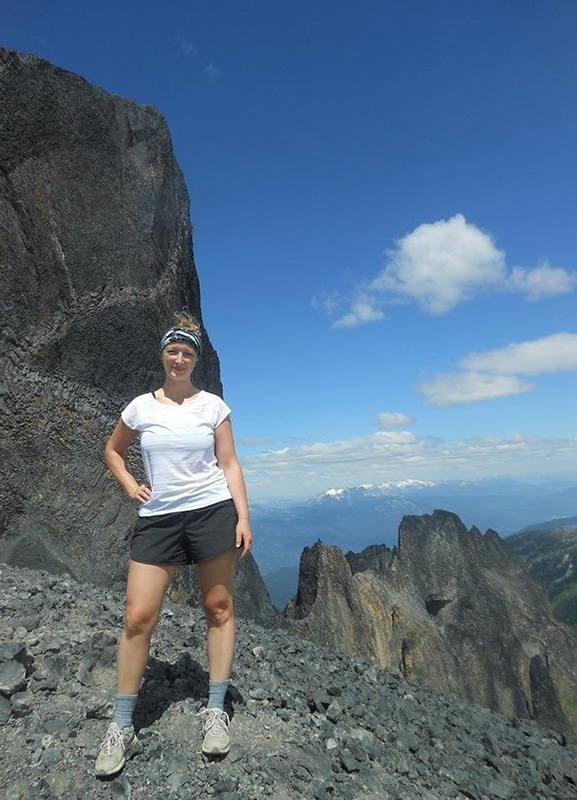 Emily at the base of The Black Tusk Black Tusk and Garibaldi Lake By Emily Sayward Last year my brother (and awesome hiking partner) Steven mentioned that he’d like to hike Black Tusk. Without even hearing any of the stats or seeing the pictures, I knew it was one I wanted to do. With a name as majestic as that, I knew it would be epic. In mid July we climbed it, and it did not disappoint. Located in Garibaldi Provincial Park, Black Tusk is the most spectacular mountains in the area, and I even dare say in this fine province of ours. With over 1700m in elevation and nearly 30km in length, Black Tusk can be done in a day; however, some people prefer to hike to Garibaldi Lake or Taylor Meadows and camp overnight, and then hike to the Tusk the following day. With other overnights planned this year, we ran out of time and had to do with guy in one day. One lonnnnnng day. Start your hike from the wooden steps in the upper section of the Rubble Creek parking lot. The manicured, well-marked dirt trail climbs steadily up switchbacks for the first 6km until you reach a junction. Going right takes you directly to Garibaldi Lake, and the trail to the left leads to Taylor Meadows (and eventually splits to go to Panorama Ridge or to Black Tusk). Taylor Meadows is absolutely gorgeous and was a highlight for me. After the seemingly endless switchbacks, and the impending steep tusk, the flat, beautiful wander through the meadows of wildflowers was a nice reprieve. Looking back over your shoulder grants breathtaking views of Garibaldi Lake and the snowcapped Tantalus Range. Eventually, you arrive at a junction with a map and wooden bench. Continue going straight along the trail for a short distance and watch for a sign and trail on your left that point the way to Black Tusk (continuing straight will take you to Panorama Ridge. Don’t worry though – this is all well marked on the trail!) The trail to the Tusk from this point climbs quickly, passing over small runoff streams and evidence of rockslides that have occurred over thousands of years. After soaking in the stunning, lush, vibrant scenery, you virtually round a corner and the terrain changes completely into a treeless, rocky, shale and lava rock barren land that looks prehistoric. In the back of my mind I felt like it wouldn’t be impossible to see a T-Rex pop out from around the Tusk, and I overheard some other hikers say the same thing! The trail leads you onto a small ridge at a BC Parks sign with a full view of Black Tusk ahead. The sign gives interesting facts about how the Tusk was formed, as well as informs hikers that this is the end of the maintained trail and to proceed with caution. It is easy to see where to continue from here as it’s a popular trail, but it is very tough (but fun!) from here to the top. Until now, though long, the hike has not been overly intense or grueling. This is where you’re going to make up for that! The next section of trail is a scramble over very loose shale towards the base of the Tusk. The shale slides with each step you take making it seem like you slide back one step for every two steps you move forward. Imagine trying to run up an escalator that’s going down. It’s exhausting work, but there are two small ridges that you can stop at along the way for a break without fear of sliding down while you stop moving. The trail eventually emerges onto a ridge next to the base of the Tusk that offers a scenic view of the entire area surrounding Garibaldi Lake. As you near the tusk, the trail narrows and each side has serious drop offs. Be careful. This is not for people with a fear of loose footing or heights. Slipping will have serious consequences here. * Most hikers end their hike to the Tusk at this point before heading back. Although it is possible to make it onto the peak of the Tusk it is not recommended as it is extremely dangerous and discouraged by BC Parks. However, it is sometimes attempted by experienced rock climbers with the proper equipment and training. To reach the chute that you can climb to the top, follow the base of the Tusk, stepping carefully to make sure you don't slide down the hill. The shale is very loose and pulling yourself up through the chute generally pulls off pieces of rock from the Tusk. Even experienced rock climbers must keep in mind that they have to come back down this same route. You will need to bring proper gear including a helmet to do last part. * (copied from www.vancouvertrails.com) After enjoying the view, it's time to head back down. What I liked about this park in general is that you can really make the day your own. The trails to Garibaldi Lake, Panorama Ridge, and The Black Tusk all cross paths many times, so you can decide what route you’re like to take. We stopped to talk with many hikers throughout the day and everyone seemed to be doing something different. We went to the tusk via Taylor Meadows, then to the Lake and back to the TH from there. Others did the opposite; or skipped the tusk and did the Ridge… you get the point. You could go many times and change it up each time. If you have questions, feel free to email Emily at emsayward@gmail.com and you can follow more of her adventures on instagram here: https://instagram.com/the_wandering_willow/
0 Comments
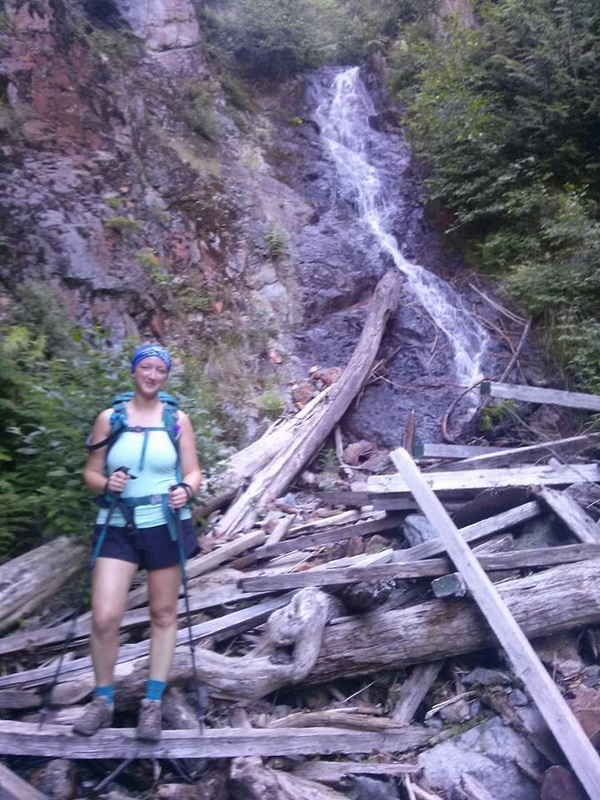
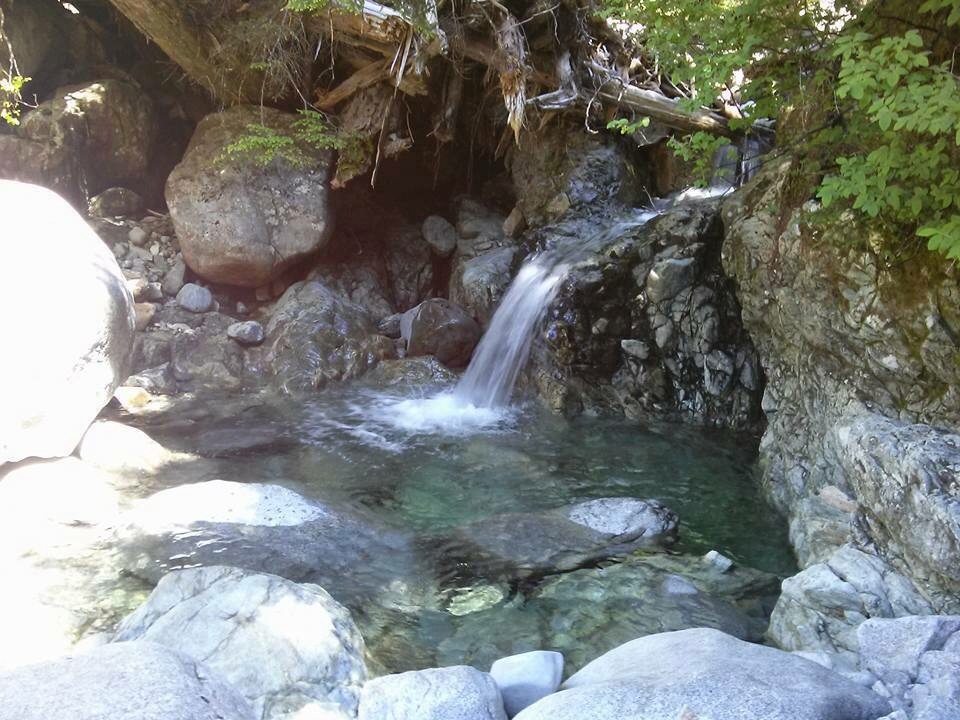
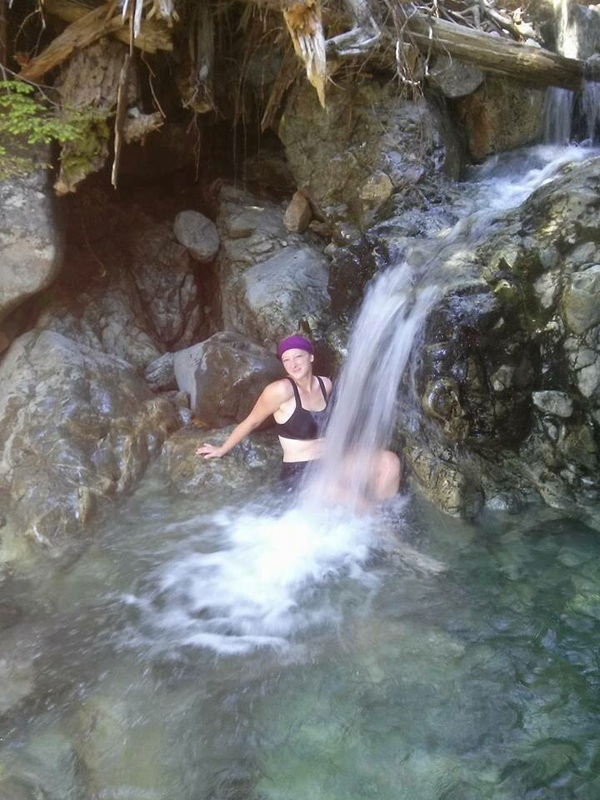 Cooling off after a long dirty hike! By Emily Sayward July 5th hike to the Saddle of the Lions (via Lions Bay) DIRECTIONS: There are several ways to hike the Lions, with two of the popular ones being from Cypress Mountain Trail Head and the other from Lions Bay. There are pros and cons to both (mainly from Cypress is slightly longer, but a little less steep). We did it from Lions Bay but would like to try it the other direction next time. Note that if you leave from Lions Bay, there are only 4 parking spots at the trail head and the parking lot is at the school a kilometer down the steep windy mountain. We got there at 6am hoping to beat the crowds but the spots were already full. We realized on the hike up that they were from over nighters. (So with the extra 2 km that added on, we could have matched the extra distance from the Cypress route and I hear the trail is nicer.) Either way, the roads are groomed and no 4x4 is necessary. Look up online for exact directions depending on that route you want. They are both easy to find. TRAIL: Starting from the well marked gate/TH in Lions Bay, follow the wide gravel road and after 5 minutes of flat terrain, you will begin your ascent. A short distance up the trail, you reach a fork that heads off to Mount Harvey. Go right and continue along the wide gravel road as it travels through a series of switchbacks, gradually snaking its way uphill. After 25-30 minutes of hiking, the trail reaches another junction. Again, go right and continue uphill as the trail begins to level. For the next 30 minutes, the trail remains at a relatively easy incline but don't get too comfortable with this as the every section you will come to gets steeper and more technical than the last. The trail wraps around the mountainside and passes a scenic waterfall (where we decided we would cool off in on our way back). * Please note that there is NO acceptable drinking water along the entire trail. There is one waterfall but it is marked that it contains (or may contain) Giardia. Make sure you take plenty of water. It's a long, difficult hike with the last grueling hour + in exposed boulder fields. We passed many unprepared hikers and urged them to turn around. Though the trail is well marked for the most part, keep your eyes open for markers. We had to back track a couple of times but it was never far and was always easy to find where we veered off. Though we blasted through the first 6.5km, the last 3km took twice as long. (Keep your pace steady as you have to reserve energy for the final boulder fields where you really need to pay attention!) Just a short distance after the trail begins to really start to climb, there is a clearing which offers a viewpoint of Howe Sound and Bowen Island. Unfortunately my brother and I hiked it in the midst of the hot, hazy air from the forest fires so we could hardly see a thing... but I image it would be beautiful on a clear day! For the next hour or so, the trail climbs steadily through beautiful fir and cedar forests with a significant amount of dead fall. Be prepared to climb over and under many fallen trees. Eventually, the trail opens on a ridge from an opening in the trees and standing tall to your right is the breathtaking West Lions. This is the Look Out point. From here you can only see the one Lion as the other is tucked behind it. Once you approach it from another angle you will see both, I promise! Follow the trail to the right and for a short distance you won't see any markers. Keep going and eventually you will see spray painted marks on big boulders leading you up. As you continue your climb, take the occasional moment to stop and look back at the view of Howe Sound and the town of Lions Bay where you started your trek earlier in the day. The route over the boulders continues to climb and with each step it gets steeper. The last section of the trail is the steepest, climbing up a short gully (between Unnecessary Mountain and the Lions) as you make a scramble to the top. Reaching a ridge, another small hill appears in front of you. Just a few more minutes up this section and you have reached another ridge that offers a full view of both Lions' peaks as well as the views of Howe Sound, Unnecessary Mountain, and Vancouver off to the left. If you're brave, experienced, and prepared, you can continue further and summit the West Peak from here, but we did not have time that day (and truth be told, though I love a good scramble, even this one looked daunting to me). We sat here, ate some chicken wings, and then started our descent. On the way down, we stopped at the waterfall and cooled down. A very nice reward to a long hike! STATS: (Based on the Lions Bay TH, to the base on the West Lion, and back) 18km (add an extra 2 if you can't park nearby and have to park at the school) 1328m final elevation gain (from the TH; again add more if you park at the school) It took us 9 hours, but that was with many picture breaks, half an hour (at least) at the top for lunch, and half and hour at the waterfall. So probably 7.5-8 hours of hiking time, but allow 9 hours (or more) if you like to stop. If you have any questions, feel free to email Emily at emsayward@gmail.com and/or follow her on other adventures here: https://instagram.com/the_wandering_willow/
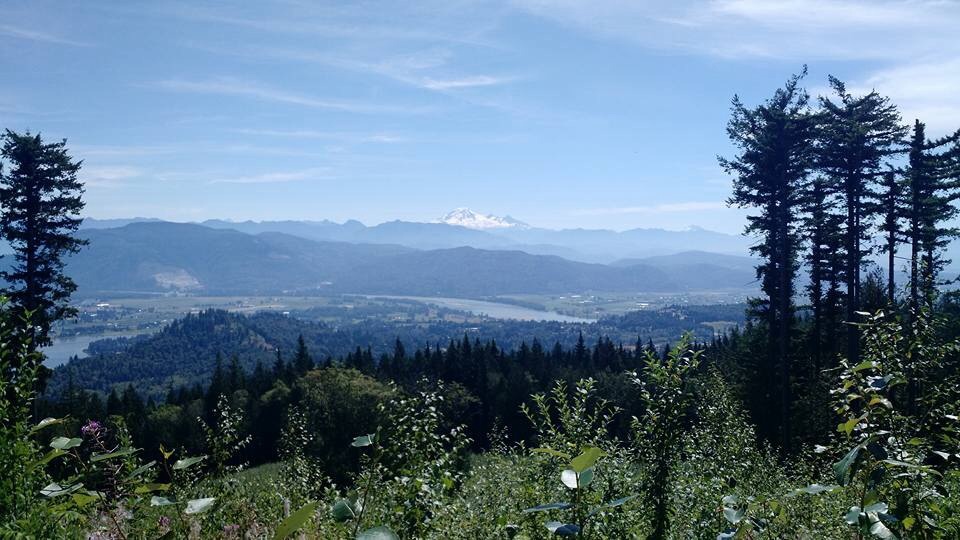
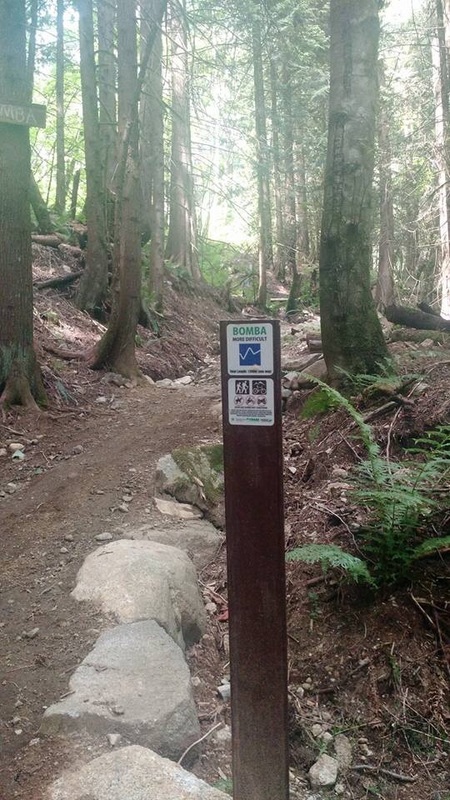
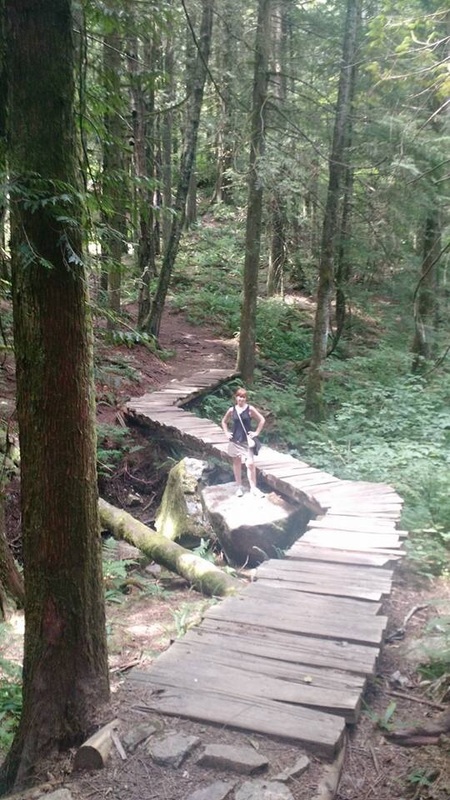
Bear Mountain A lovely little hike with a surprise view at the top. The trail up Bear Mountain is also sometimes known as Pioneer Trail however we didn’t find any signage to that effect the day we went nor any pioneers for that matter. What you will find are all kinds of mountain biking trails that we thought doubled really well as hiking trails. Directions: Head east on the Lougheed Highway and turn left at Dewdney Trunk Road where there’s a Co-Op gas station on the corner. The road bends and curves and eventually you will drive by Westminster Abbey. Shortly after turn right on Stave Lake Street. Soon you come to an intersection where you have to turn right to stay on Stave. Don’t turn, keep going straight. The road is now Doyle. When you get to an intersection with Richards Street, continue straight. It’s a dead end and this is the trail head. There’s a house on the right so don’t block their driveway. There’s no sign but enter the forest at the trail head. Right away there’s a Y intersection. Stick to the left and cross and short wooden bridge. Continue on this trail up through the forest. You’ll know it’s a bike trail because of the curved/banked corners but we didn’t meet anyone else on the trail. The bottom part has a few steeper sections but they’re short and flatten out quickly. At one point we saw a sign on a tree for another trail named Cranks which headed down to the left a bit. Just stay on the path and keep going up. There’s minimal trail tape but you’ll cross a lot of little wooden bridges. The forest is really beautiful and open and you see the sky peeking through almost the whole time so you think you must be almost near the top. Eventually you will come to an intersection for a two trails called Corduroy (easy) and Bomba (more difficult). Turn right here and head up Bomba. It’s a little bit rockier than the rest of the trail but only for a very short distance … nothing to worry about. All through the forest there are jumps and platforms for the mountain bikers. Stay on Bomba and eventually you’ll come out of the forest at a sign that says Back Door (most difficult). This is your marker to find your way back onto the trail. Turn left and head up the gravel road for only about -300M to the top where it flattens out and you are rewarded with a beautiful view of the end of Hatzic Lake, the Fraser River, Sumas Mountain, Matsqui Prairie, and way off in the distance Mt. Baker, Slesse, and even Elk and Thurston! The whole hike including a 20 min. stop up top was only 2 ½ hours. There are other entrances to this mountain where you can find other ways to the top so it’s difficult to estimate the exact amount of elevation but the directions we had said it was 200M and 2.4kms return. I can tell you for sure it was probably double that length and felt like we gained more than 200M. Once you’re back down you’ll have time to head over to Cascade Falls to complete a really great day! 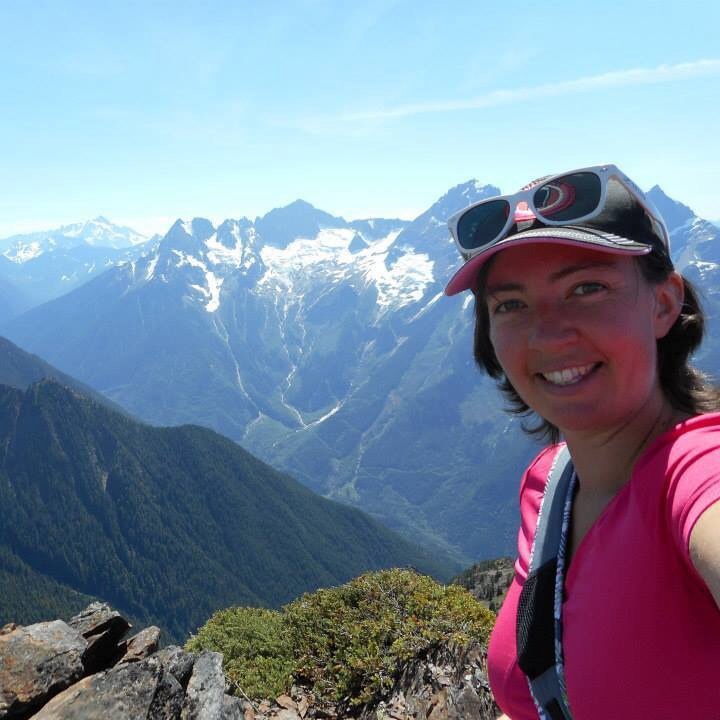 "Hiking from the bottom to the top of some of the highest mountains I've ever climbed has given me the confidence to climb many more." Carolyn Putt "Hiking from the bottom to the top of some of the highest mountains I've ever climbed has given me the confidence to climb many more." Carolyn Putt Meet Carolyn Putt. She's my guest blogger...If I was to tell you about Carolyn this would be my description: She's a mountain goat, has a zest for life, a positive attitude, is friendly, educated, a peak seeker, has goals, photographer, writer and is involved in making her community, Chiliwack, a better place. I have met Carolyn just once while I had lunch on the Flatiron/Needle Peak Trail. Her all time favorite hike...I had been following her adventures through a Chilliwack hiking page we are both part of. I'm thrilled & grateful to have her as my guest blogger...Here's her adventure at Yak Peak! Lori aka Scaredy Cat By Carolyn Putt~
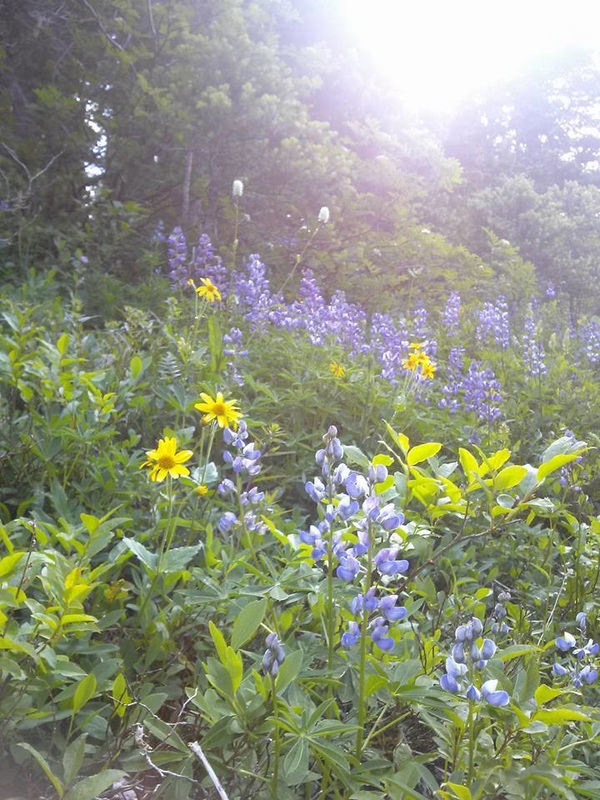
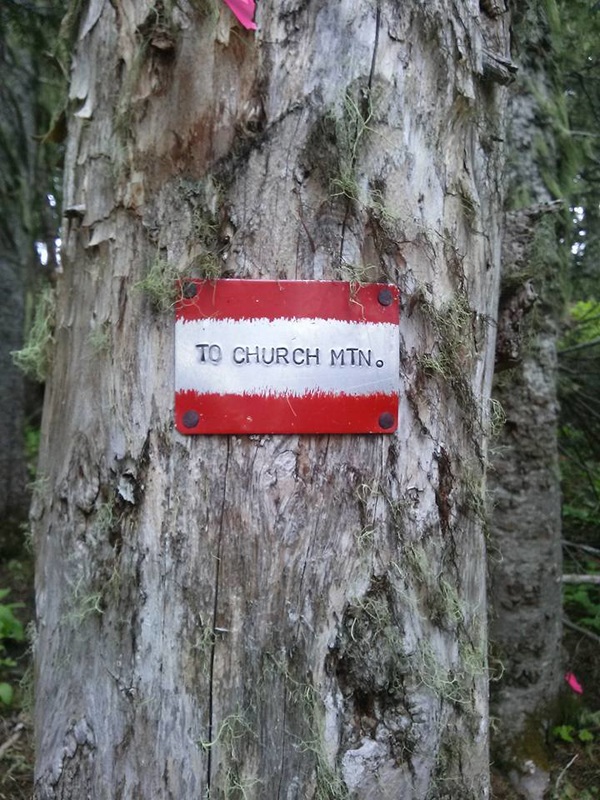
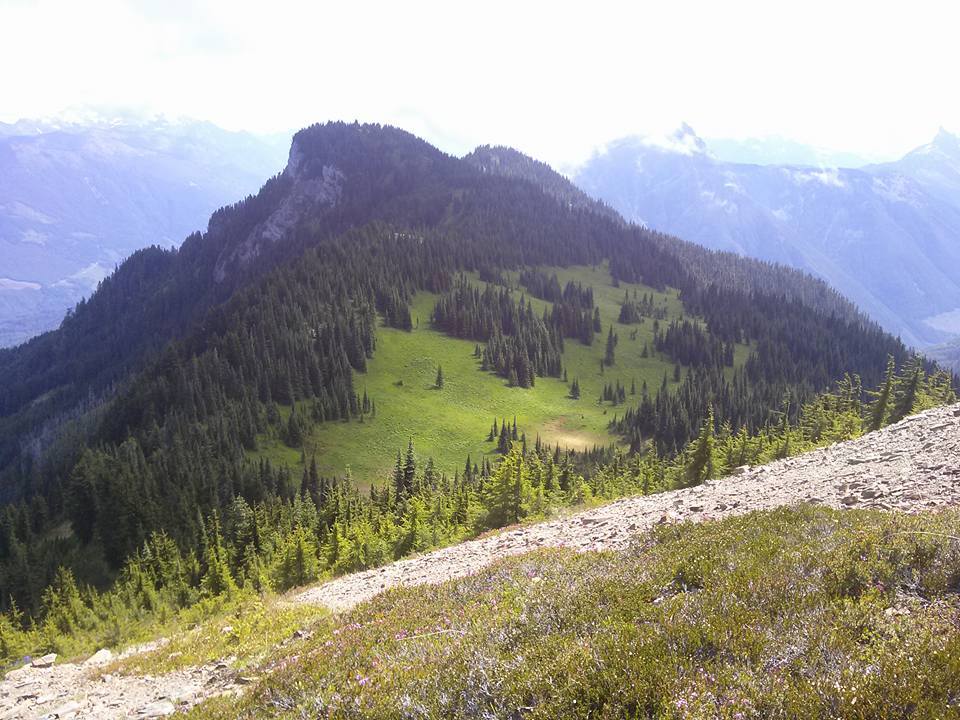
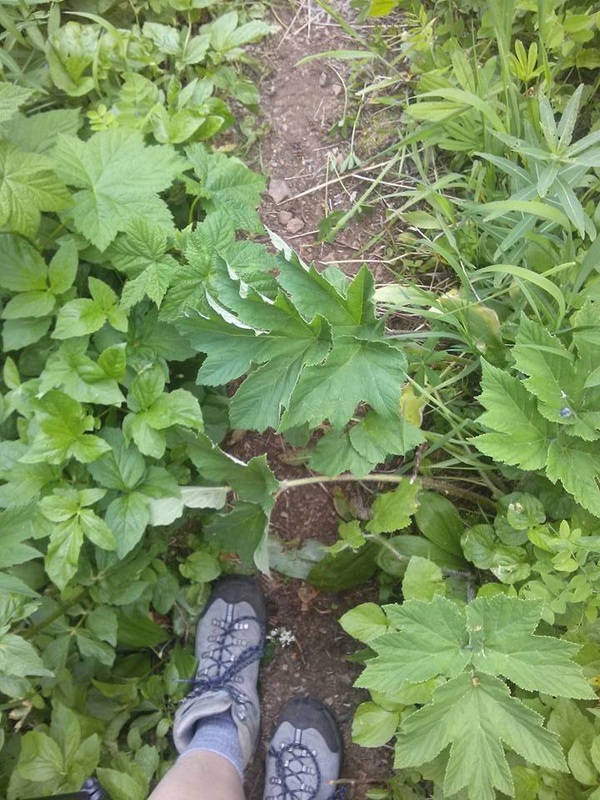
5.5-6hrs? I scoffed as I started heading down from Yak Peak. Ha. Who gave those time estimates? I’ll be done in 4 hours, and that’s with a 45minute break at the summit! All those hiking sites always over-estimate timings. Right? Or not. Turns out that 2 hours up, 45minutes at the top, and 3 hours down, puts me right in their time estimate. Here’s hoping that if you’re reading this, you can learn from my mistakes, and NOT take 3 hours to get down, when 1.5hrs should really suffice! I had attempted to hike Yak Peak back in the Spring, but only made it about half way, as snow and icy conditions got in the way (and made for a whole lotta slips on the way back down). This time round, jet lag woke me up nice and early on a Saturday morning, and so since I’d been out of the country for a few weeks, busily visiting people, and missing my mountains, I took off for a solo hike (yes, yes, I did let someone know where I was going and what my plan was!). Parking at the truck stop at Zopkios (same exit as for Needle Peak), I walked East up the off ramp of the highway. Other posts I read said to county 5 lamp posts from when you hit the highway at the start of the off ramp….. I counted 8, and then on your left you should spot a pretty dilapidated traffic cone that marks the start of the trail. It’s pretty overgrown down to where you cross a little stream (which was an awesomely perfect place to cool off at the end of the hike!!), and then head into the forest. The trail goes up for the first 30min ish, nice and steep to get your heart going right off the bat. A few parts of the trail were blocked with tree fall, but it was always easy enough to find a way around, and though I went off the main path a couple times, always ended up back on the real trail soon enough – just keep heading up! Breaking out of the trees, you hit a nice little boulder field, with very well-marked cairns showing you the path of least resistance up. The exit is right at the top middle of the boulder field, and then suddenly you’re at the base of the mammoth slab of rock that is Yak Peak! I heard voices as I made my way through the boulders, and at this point, realized they were coming from 3 guys scaling the rock face. Glad I wasn’t taking that way up! Turning right, the trail skirts along the base of the rock face, and then up along the side of it, over rocks and weaving in and out of some tree patches. This part of the trail is “exposed” as in you can definitely look down and see all the way down to the highway below you, but not exposed in the sense that if you fall you’re going to tumble to your death. It all felt pretty safe, but perhaps not for someone with a fear of heights. Soon you hit a couple sheer rock sections you get to climb up – one has a nice sturdy rope to help climb, and the other actually has a trail that goes into the trees so you can avoid it if you want to. (On the way down, as you reach this section again, when you hit the sheer rock face and think “wait a second, I have to slide down that???”, look to your right and remember that there is a trail in the trees that gets you around it nice and safe!!). You may be tempted (as the couple in front of me did) to leave your poles behind here, as hands become very handy in the next section of rocks…… but if you can fold your poles up, do so, as they will be very useful further up on your way down! After a bit of steepness, the trail opens up completely, with no trees left, just lots of rock and little bushes along the ground (wild blueberries!!!!!!). This part of the trail doesn’t look steep, but as you move along it, your legs will make you realize that you are in fact still gaining a good chunk of elevation! Lose rock and pebbles take over here, which is fine on the way up, but coming back down it is NOT as fun, which is where poles would come in quite handy. This was probably the sketchiest part of the trail, with lots of slipping and sliding. The trail is very easy to follow the whole way along, and brings you to a small col between the false peak (which you were probably thinking, as I was, was the real peak that whole hike up), to you left, and the real summit to your right. Visit both, as neither are very far!! The peak itself is actually HUGE, with lots of rocks and views to explore – and unlike Needle Peak over on the other side of the highway, not many people seem to visit it! The one other couple I saw only went to the false peak, and then I didn’t see anyone else till I was on my way down from the peak….. So I had it all to myself for a good 45 minutes of lunching and lying on a perfect flat rock. The views at the top were AMAZING!!! A really neat new perspective of Needle Peak, and views out over Alpaca and Vicuna and hundreds of other peaks I couldn’t name. The trek down, though slippery on the gravel, started off well. I was actually thinking about what I was going to write in this blog post, about how well-marked and easy to follow the trail was, when I suddenly realized I was stuck. I had made my way back to “the” boulder field, or so I thought…..but as I started down it, I soon hit a bunch of trees and brush and forest, which I tried to bushwack down through and across, figuring I must be just off the main boulder field somehow. Eventually I hit another boulder field, and made my way across it, looking for markers, but finding none. That boulder field ended, and I was out in the open, back at the base of the rock face. Not knowing whether I had gone too far, or not far enough. It was getting pretty hot out, and I was feeling pretty tired, as I’d spent the last hour bush-wacking and boulder hopping in the sun. I headed back East-ward, hoping I would see some tape, or recognize part of the trail. I got to the point where I had turned down into the boulder field….cause it looked like a really obvious trail…..just clearly the wrong one! I kept heading back and eventually spotted a guy in the distance, who had gone up after me. I was super relieved and figured I would wait for him and follow him down. BUT In the time it took me to text my friend to let her know I was saved, the guy disappeared!!!! NOOOOOOOOO. My chance of rescue was lost. Ok, so that’s obviously a bit over dramatic, as I wasn’t really lost. I could see my car this whole time, I just couldn’t figure out how to get down to it! Plus, there were still a good 8hrs of daylight left, AND I had cell service. I kept following the rock face over in the direction of where the guy was, and then, finally, saw some marking tape! And right there, was a little entrance into the bush that led to THE boulder field!! It can definitely be easily missed if you aren’t really watching for it, and for the marking tape. I built a quick little cairn to hopefully help anyone who may follow in my footsteps. It isn’t a huge one though cause I was really needing to find some shade and so didn’t want to stay any longer than necessary in the sun! All was nice and easy from there on down, boulders, forest, STREAM and then back to the parking lot. So without any detours, the trail can be done at a moderate (I was not going fast) pace in 4.5hrs no problem, even with a nice long break at the top. Stats wise, Club Tred tells me the hike is 5.5kms return, with 825m elevation gain, which explains why my quads were feeling sore the next day 😉 I definitely felt like I deserved my nice big Frosty at Wendy’s after this. 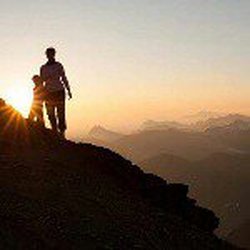 "Lover of life. Seeker of adventure. Appreciator of all things beautiful." Emily Sayward Emily Sayward is a single working mom. When not working you'll find her outdoors spending quality time with her son soaking in the beauty that nature offers. Look for future guest blog posts from Emily... ROAD/DIRECTIONS: From Chilliwack, drive towards Cultus Lake. Drive through the town, and then turn left on Sleepy Hollow Road. Set your odometer to 0 here. Sleepy Hollow Road turns into Vance Road and then into the Chilliwack-Liumchen West forest service road at .9 km. Keep left at 4.4 km when the Chilliwack-Liumchen West FSR veers off to the right. AT 5.8 km, keep right and climb for 7.5 km. You'll have to leave your car here, or if you have a 4x4, take the right branch here and climb the last 1.9 km to an elevation of 1440 meters at the trailhead. A friend had told me ahead of time that you need a 4x4 to get to the TH. While we were driving I kept thinking that was silly – my little Corolla could make it no problem! BUT, I now see what she meant. The last 9 km are rough. Clearance is needed without a doubt as there are deep potholes and large rocks scattered throughout the trail. The road winds up and the higher it goes, the steeper it gets. An AWD may get you there, but even at that I’d be hesitant. Take a 4x4 if you can. You won’t regret it! The road is very narrow in places with room enough for only one vehicle. Remember that this is a heavily used ATV area so take the corners slowly and we honked as we were approaching to be extra safe smile emoticon TRAIL: At the end of the FSR there is a parking lot where you will find the trailhead. The first 1.5 km (45 min approx.) of this trail climbs pretty steeply. There are some beautiful views of the Chilliwack valley and range just before you head into the forest. The trail then heads into the trees and you follow switch backs up to the top of the ridge, bringing you to a lovely lookout on the first bump of the ridge called "Windy Knob" (WK) at which you will be rewarded with a breathtaking view of Mount Baker and the surrounding ranges. From this lookout, the trail descends and leads you below the ridge (and then drops a couple hundred metres to Liumchen Lake itself if that’s where you’re headed) Allow another 1.25 hours to the lake from this point. The trail is very easy to follow but very narrow. Though it’s not difficult in terms of incline, the trail you’ll take down into the lake valley is never more than 2 feet wide. More often it’s just wide enough to get one foot in front of the other. In addition, there is significant foliage pouring over the trail which is sharp and scattered with giant hogweed and thistle, so pants or gaiters are very recommended. The trail is loose and for some of the time has a steep drop on the outside edge. Balance and sure footing is a must. Take it slow. Don’t let kids run too far ahead. What we decided to do was follow the trail past Windy Knob and take a turnoff at the split (about 20 minutes from WK) marked “Church Mt.”. If you plan on taking this route, keep your eyes open. The marker is on a tree and is only about 4 inches wide so it’s easy to walk right past it! We followed this trail as it skirted around the base of and unnamed ridge and ascended to a beautiful exposed peak called Old Baldy. This peak is north of Mt. Liumchen, north east of Liumchen Lake, and west of Church Mt. We hung out on the peak for awhile, taking in the views. It’s a great place to stop for lunch (and set up a camp if you want to stay over). From Old Baldy, we descended south west over the side. There was no trail so we made our own switchbacks. This was very rough terrain: I would estimate a minimum 45% grade (steeper near the peak, gradually leveling out near the base), the brush/foliage was tall (almost to waist) and was stiff and scratchy on exposed legs and arms, the ground was loose and full of marmot holes, and it was all scattered with hog weed and thistle. It took over 45 minutes to descend to the bottom of the peak and we were stiff, scratched and sore by the end of that section! At this point we worked our way north down mid-grade switchbacks and through large meadows to eventually join the trail to the lake. We hiked the slowly descending trail to the lake. Surprisingly we were all a bit unimpressed with the lake. Though it gets great reviews, I found there was no shore to sit on and the ground was wet and boggy. The water was brownish and definitely not tempting me to jump in. The mosquitoes were bad, and we had just come across 6 large fresh piles of bear scat, so we were anxious to see the lake and then get the heck out of there smile emoticon From the lake back to the trail head was about 2.5 hours with a slight but steady incline up to Windy Knob and then back down the switchbacks to the TH. ADVANTAGES: The highlight for me for this trip was the wildflowers. They are in full bloom right now! Lilies, Columbine, Daisies, Lupines, Fire weed and more! The wide expanse and views were breath-taking. It’s neat to be on top and look around at other peaks knowing I’ve been on the tops of many others. They look so different from that perspective. This range offers such diversity: the trail is steep, then flat, wide(ish), then narrow, switchbacks, then wide open meadows, etc. I also liked that in over 7 hours of hiking we only ran into one family. That quiet and peacefulness is something you won’t find on Elk or Cheam this time of year! STATS: If you chose to hike straight to the Lake, allot about 6 hours for your 10km return trip. It is rated at a 3% grade (the first section is very steep but there are also large sections of flat walking so overall it’s not a steadily steep hike) I have researched extensively and cannot find stats for the Old Baldy, Mt. Liumchen range route that we took. I would estimate 14 km from the TH to peak, to lake, finally back to TH with a higher percentage grade of incline. But again, it’s not all uphill - It’s up and down the entire time. RECOMMENDATIONS: - I didn’t particularly like the route we chose doing both the peak and the lake. I would recommend one or the other. If doing the peak, take more time and explore Church or further on to Liumchen Mt. (As far as I understand, there is no established trail to Liumchen Mt. peak, but not to say it’s can’t be done) - Though I haven’t seen it myself, I hear it’s beautiful in the fall/spring with snow, though can be very windy and cold. - This area is known for bears. Make sure you take appropriate precautions. I will definitely do this hike again but next time will explore Church or continue on to Liumchen Mt. - I found that the temperature changed a lot. I have never changed more often during a hike – from tank to sweater to down jacket back to tank, etc. Make sure you bring several layers! Any other questions? You are welcome to email Emily at emsayward@gmail.com and you can follow her on other adventures here: https://instagram.com/emily_sayward/  So it's a treasure you seek? What could be more fun then hiking and looking for a treasure while doing so? Similar to Geo-caching but you're taking and you don't have to give back. Pretty little gifts, for you to enjoy or give away! Clue #1: Levette Loop: Squamish~ Walk up a snaky path...On your right giant rocks look down at you. A skinny tree with a red trail marker greets you. A crevice in the tree; where moss & leaves don't belong, is the treasure you seek! Clue #2: Lighthouse Park: West Vancouver~ Walk along Valley Trail to Lighthouse Lookout. From here you'll see there's no access to the beach. Walk down the rocky knoll to a path surround by park houses. There you'll see a rocky path down to West Beach. On the path, three Arbutus Trees greet you. Next to them is a tired bent tree...Here in that tired tree is a crevice and the treasure you seek! Clue #3: Pankhurst Ghost Town: Whistler On the trail in the beginning you'll come to a branch...Go right down the trail and carefully cross the tracks where you'll see flagging tape. In here in a beaten cars wheel base is the treasure you seek. Clue #4 & 5: Ancient Cedars Trail: Whistler #4-A snaky rocky path with elevation & tall rocks to the right...on your left is a hollow tired tree and the treasure you seek. #5-Among the great ancient Cedars three, there's a perfect shoe size foot hole to boost you up high in the tree. In the foot hole is the treasure you seek. Clue # 6 & 7: Harrison Grind:Harrison #6-A creek crossing and shortly after a 10 ft washed out trail that goes down a bit and not long after a mossy covered log on your right with a split in the middle is the treasure you seek. FOUND: May 17, 2015 #7-At the heli pad is a soggy tired stump. Peel away the bark and deep inside is the treasure you seek. Clue # 8: Elk Mountain:Chilliwack #8-At the 2.5 Km's sign post...at the base of the tree is a crevice and the treasure you seek. Clue #9 & 10: Tikwalus Heritage Trail: Spuzzum #9-At the Chief Pahallak lookout...there's a knot in a nearby tree, this is where you'll find the treasure you seek. #10-At the camp you'll see a Bluffs Route sign post. It is here where you'll find the treasure you see. Clue #11: Mount Fromme: North Vancouver At the true south summit sits a tired ole' summit sign post nailed to a tree. It is here, attached on the nail, the treasure you seek. *Found twice and put back both times* Clue #12: Cypress Bowl Lookout: West Van A the end of the rock wall near the washroom under a large rock is the treasure you seek. FOUND: May 18, 2015 Clue #13: Petgill Lake: Howe Sound At the lake's edge is a hollow tree. Deep inside covered in moss is the treasure you seek. Clue #14: Needle Peak/Flatiron: Coq Highway On the last rocky outcrop before you decide on Needle Peak or Flatiron...Just before elevation begins is a cluster of trees, at the side of granite facing Flatiron is two old logs. Under those two logs is two small pieces of granite and the treasure you seek. Clue #15: Mt. St. Benedict: Mission After passing two lakes you feel like you can't carry on but you mush. A quick much easier walk to the top at the summit is a sign of golf and is where your treasure awaits. Clue #16: Skyline 1: Manning Park As you near the 5 km marker there's a section that is open and the grade easier. On a tree once alive now resting on its side hook to one end is the treasure you seek. Clue #17: Alder Flats: Golden Ears At the Gold Creek Lookout on a stump of a base blanketed in a loose rock is the treasure you seek! Clue #18 &19 & 20: Joffre Lakes: Pemberton 18-At Middle Lake on a bench to rest is a funky tree. Covered in loose bark you may dig deep for the treasure you seek. 19-When approaching Upper Lake a bridge to cross with a small cascading waterfall. Under the bridge is the treasure you seek 20-At Upper Lake some go to a rocky outcrop to rest while others carry onto the campsite. A small sign points the way and beside that sign under a rock is the treasure you seek. Clue #21& 22 Elk Mountain re-visited: Chilliwack 21-At the wind soc/the un-official summit if a Elk is a bench made of fallen materials, a funky tree tucked away is the treasure you seek. Clue #22 & 23 Mt. Thom-Chilliwack 22-as you near Thom's peak us a sign post before you turn right. Beside the post buried in dirt is the treasure you seek. 23-At Thom's summit as you leave us a neat tree on your left. Look here for this is where you'll find the treasure you seek. Clue #24 & 25 Mt. Sleese Memorial Trail-Chiliwack I felt funny about leaving treasures near or at the memorial plaque so they are along the trail, well before. 24-A small tree with two orange trail markers is the treasure you seek. 25-Two funky logs, inside one I where a hole is deep is the treasure you seek.   Clatsop Loop Length: 3.8 km Elevation: 250 metres elevation This loop is part of the Tillamook Head Trail that you can start in the Ecola State Park and it ends in the town of Seaside or vice versa. The Tillamook trail head is 9.6 km one way or 19.2 km if you want to do return trip. You can catch a taxi in, Seaside but it will only drop you at the gate of the park which will give you a few km walk back to your car and cost you around 20 dollars. Because I was trying to fit in as many hikes as I could I did the Clatsop Loop but was told by locals the full trail is a must do if you have the time. Tillamook Head dominates the coast and is especially visible from Seaside where it is a major part of the landscape. This trail reminds hikers of its acquaintance with the Lewis and Clark expedition where in 1806 members of the expedition hiked over the head to what is now Cannon beach to the base of Ecola creek to (now Cannon Beach) to scavenge what they had heard of a dead whale being beached there. When they arrived local natives had already stripped the corpse and the crew then bartered for meat and oils. I started the trail where there was signage for lighthouse viewpoint, this thin but well used trail starts quickly going uphill along the bluffs above the ocean giving you a few beautiful views of the deactivated Tillamook Rock lighthouse. The trail levels out to a slight Incline after a I would call around 2 km but I had nothing to measure this by. From the last lookout you have a nice wander through the forest viewing some very large and very old trees until you reach s backpacker campsite, 3 walled shelter, picnic tables and firepit. From the camp there is a small trail leading west that brings you to a ww2 gun battery almost obscured by the forest and another lavish view high atop the cliffs over the ocean. After a quick lunch you head east out of the camp and it brings you downhill a wide gravel road along Indian creek. I just ran down this road past some educational interpretive forest signs around another mile half till I returned to my car. This trail was very enjoyable and if I had more time would love to finish the whole Tillamook Head trail. For all you scaredys' when the trails came close to bluff edges there were sturdy fences and along the trail there were no open steep places. I fully recommend this hike. Watch for more up-coming hikes from Dave's trip to the Oregon Coast! 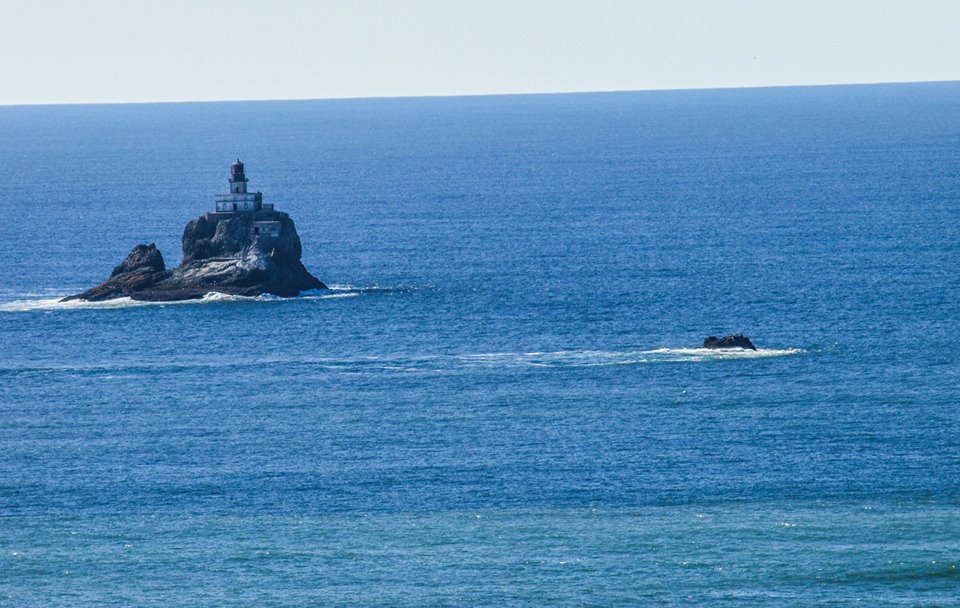 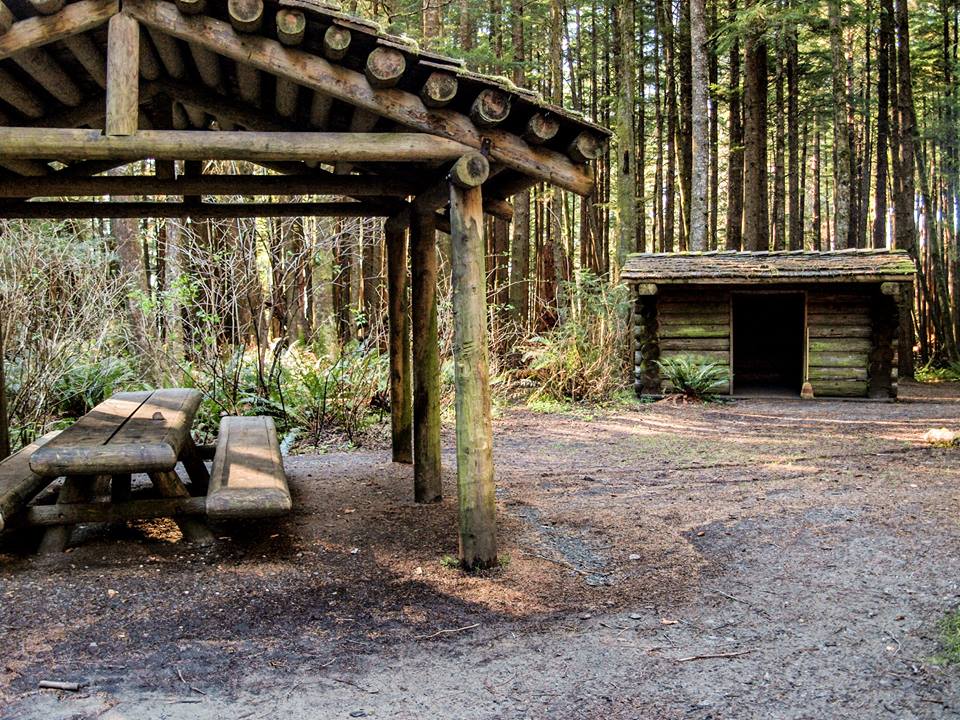 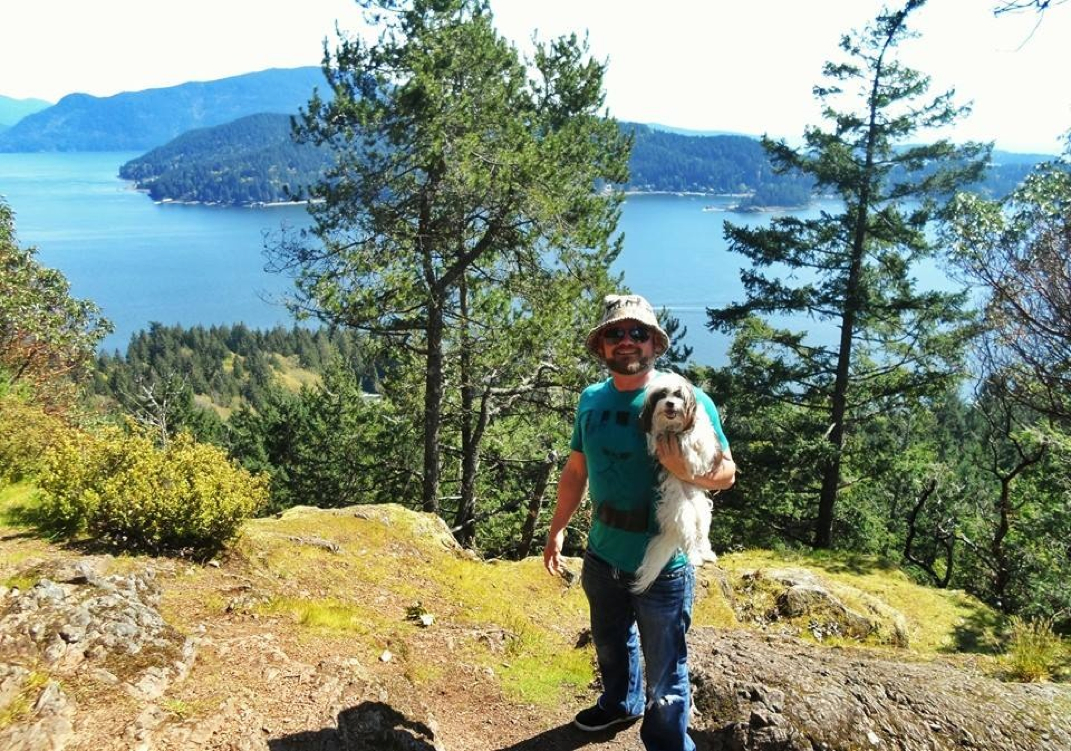 Dave Lastik & Fedora: the mountain dog. Soames Hill summit. Length: 5 Km's Elevation: 250 meters Time: 2 Hours I did a great little hike beautiful views in Gibsons on the Sunshine Coast called Soames hill aka knob hill. Soames hill park has various trailheads of varying difficulty that lead to the 2 summits with gorgeous views. I took the more difficult trail from Soames road off marine drive. The trail is a steep 1 km of just under 500 stairs that meet up with the other trails on way up. At the end of the stairs are a signpost for the two summits. Both viewpoints has stunning sights of Keats island, bowen island and Vancouver Island all nestled into the Georgia straight. For safety reasons keep an eye on children and dogs at the viewpoints as there are sharp dropoffs. A fun short trail that I fully enjoyed. 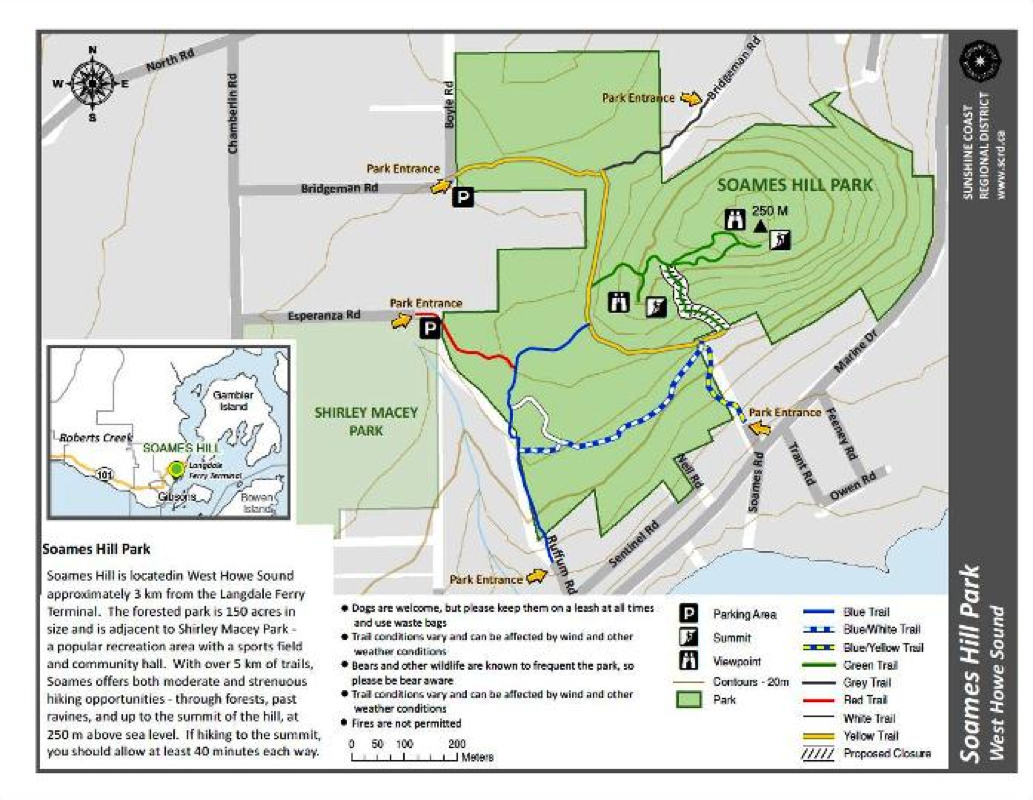 Map courtesy of the Sunshine Coast Regional District. 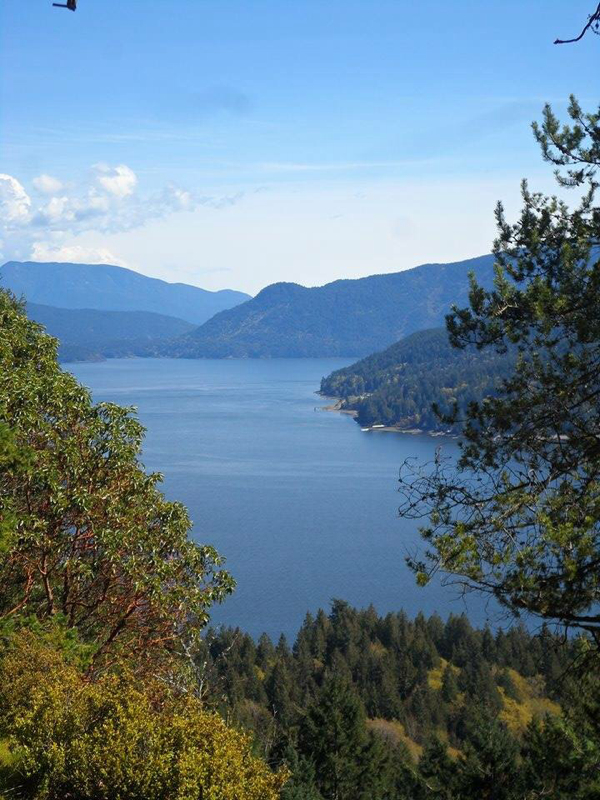 Views of Howe Sound, Keats & Bowen Island  Howe Sound view of Gibsons. Directions: Courtesy of Trailpeak: From the Langdale ferry terminal, Chamberlin Road is 2km along North Road. Access to the park can also be gained from Marine Drive 1.1km from Langdale ferry terminal. There is a wide spot on the right for parking. You'll recognize Soames Hill from the Ferry as it is a well-rounded "hump" of a hill that is thickly wooded. 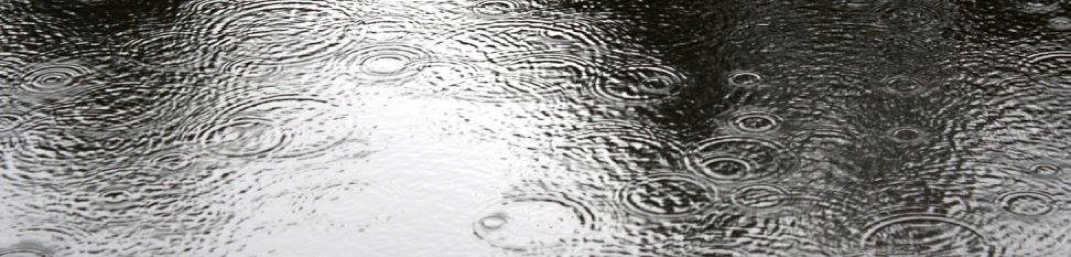
Spring is finally here. Time to hike! However, it might be dangerous to go higher up in the mountains with avalanche risks or slippery rocks & roots, but you still need your nature fix. There's nothing like a walk in the forest after it has rained. The sweet smells will make you happy that you got out. You'll release some stress and feel great. Here's some terrific walks and hikes you can do on a rainy day! ~Brae Island...a nice flat well groomed 4 km trail walk in Fort Langley that follows The Fraser River. Add Fort to Fort to make it longer. ~Menzies Trail at Golden Ears. A 9 Km's hike that can be done as a loop or an in-out trail. Expect wet feet as you'll cross many streams and one waterfall. I have a lot more trail walks to choose from: http://www.hikingforthescaredycat.com/my-trail-walks.html#.VRK-j2K9KSM Happy & safe trails! Lori aka Scaredy Cat. 
Buntzen Lake
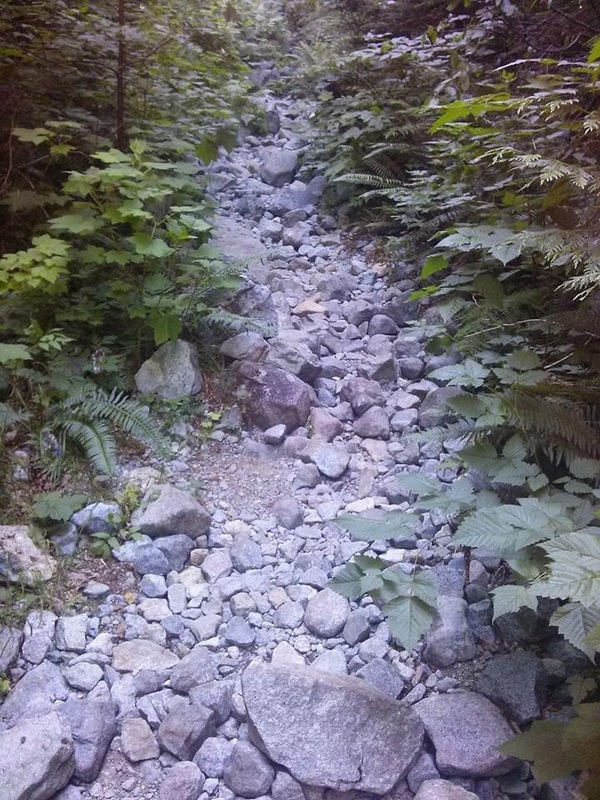
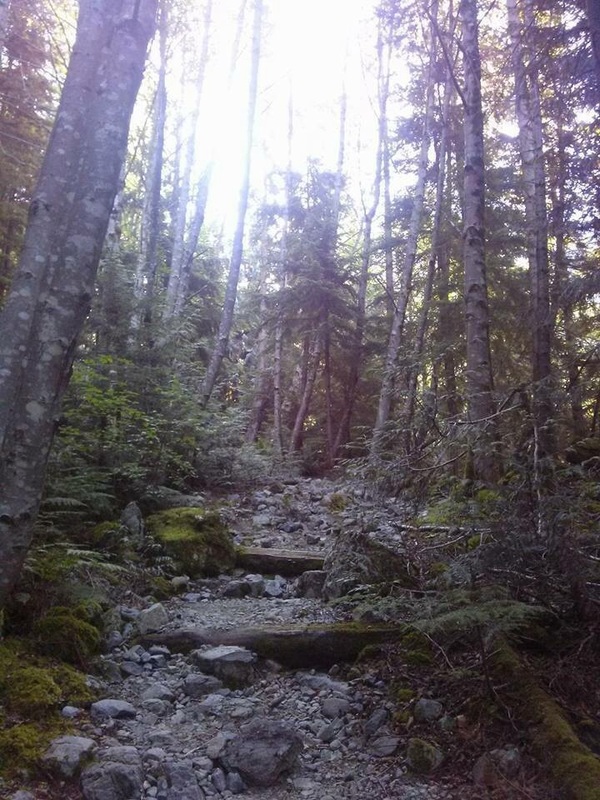
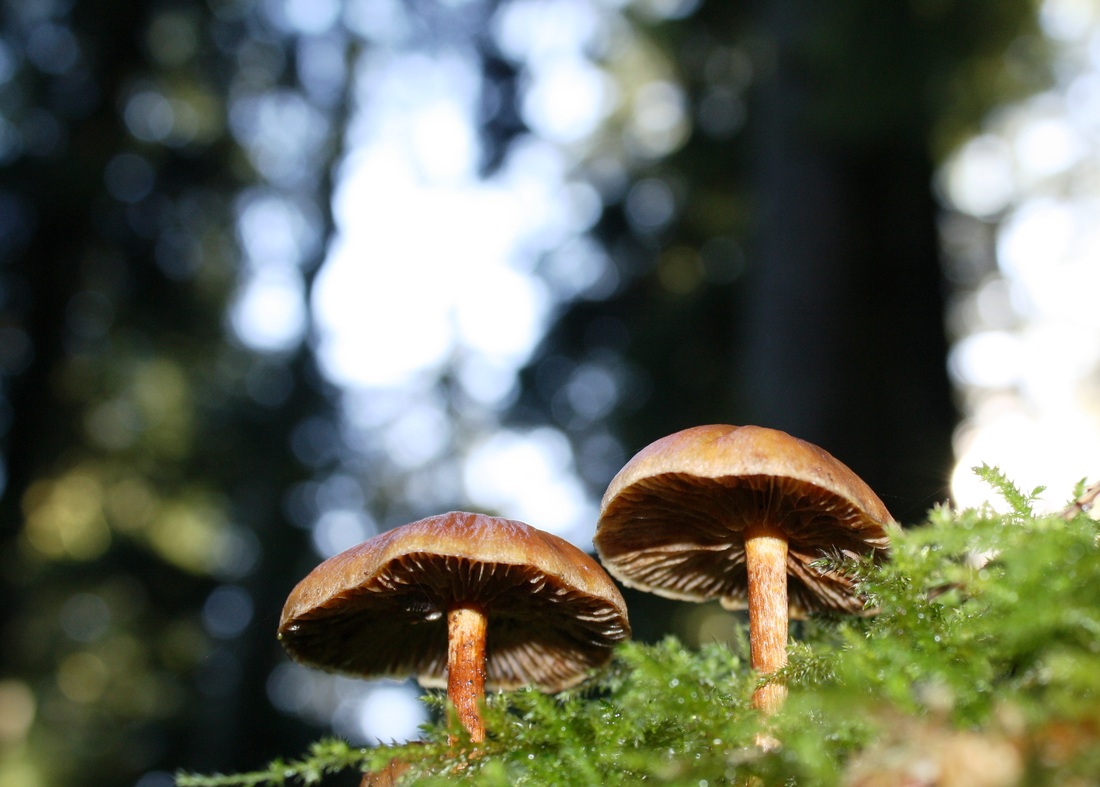
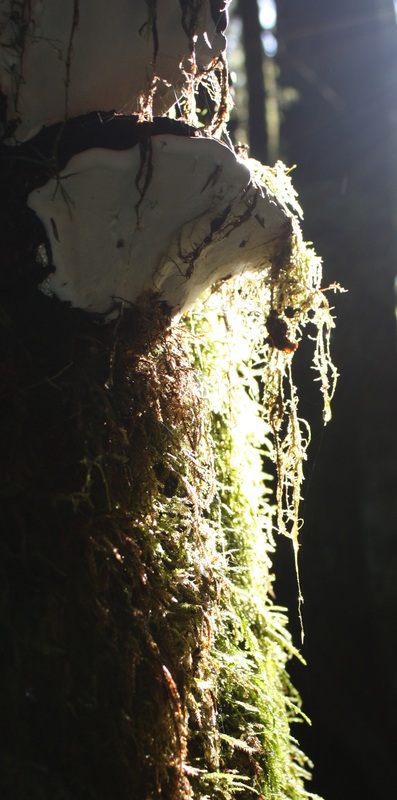
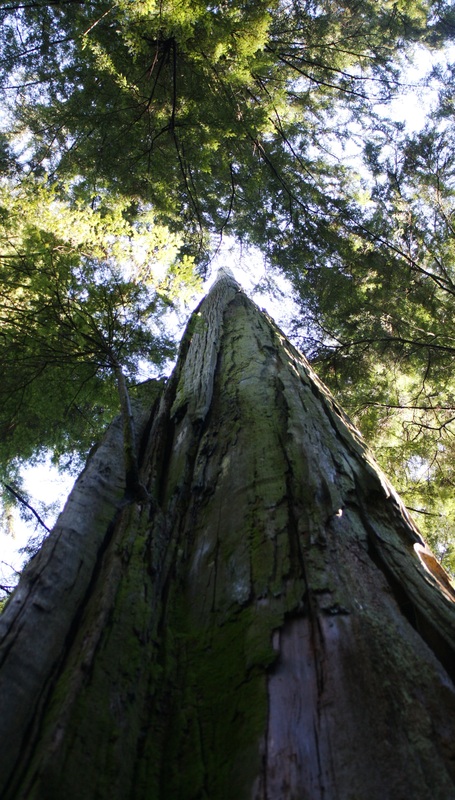
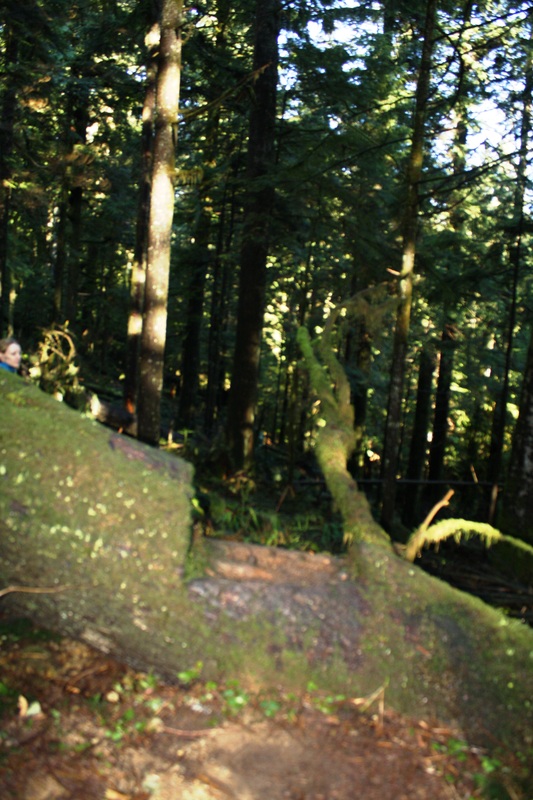
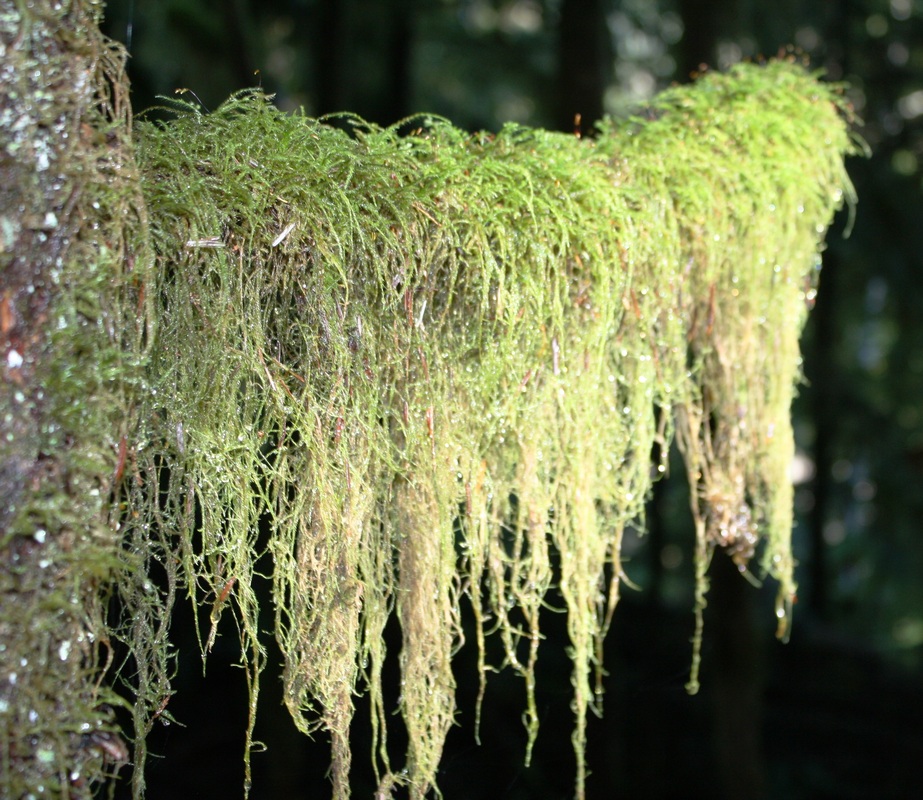
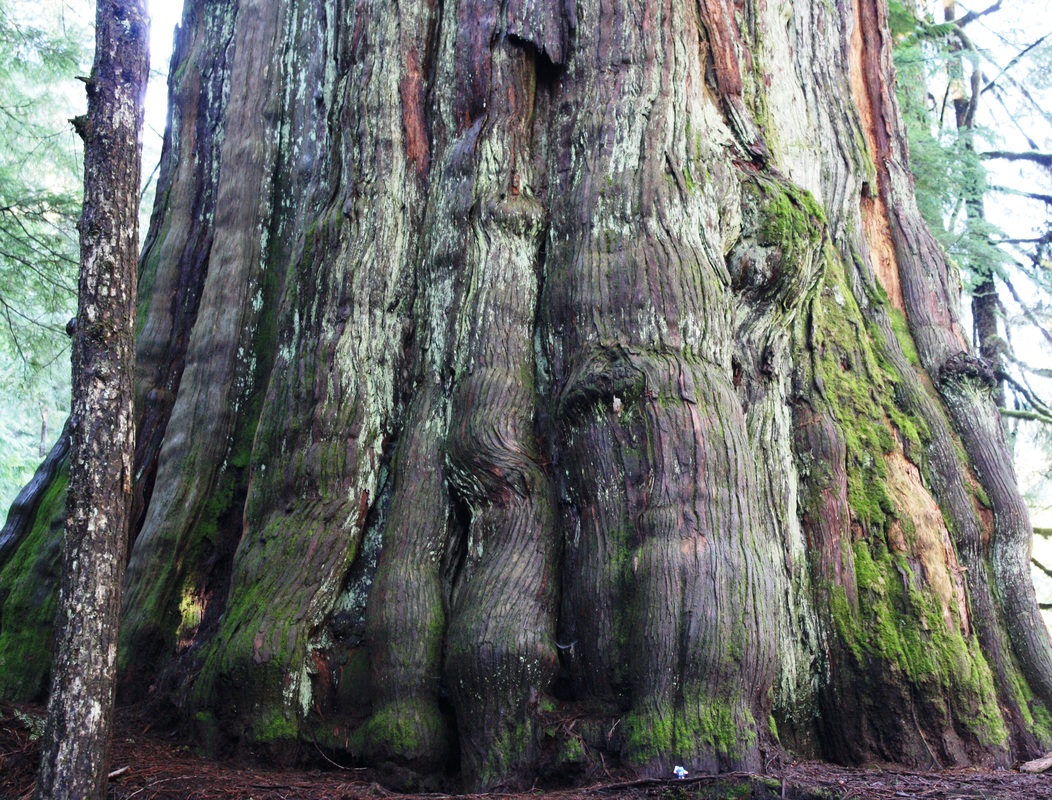
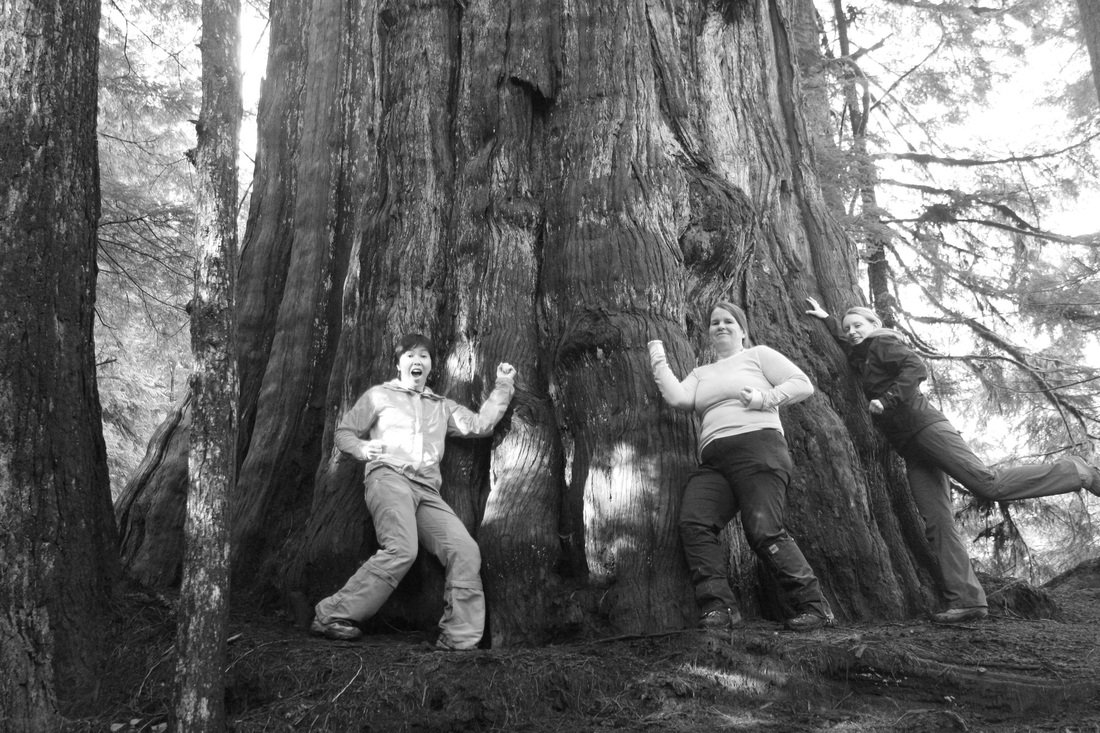
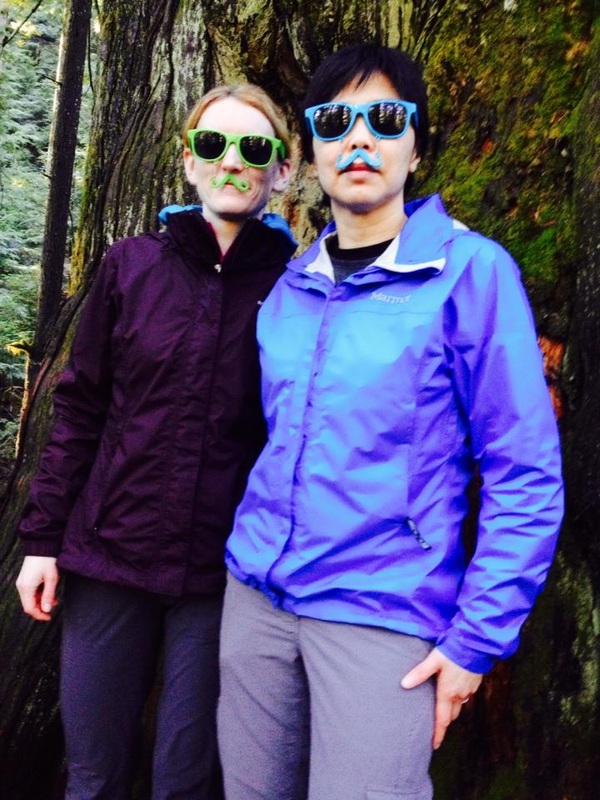
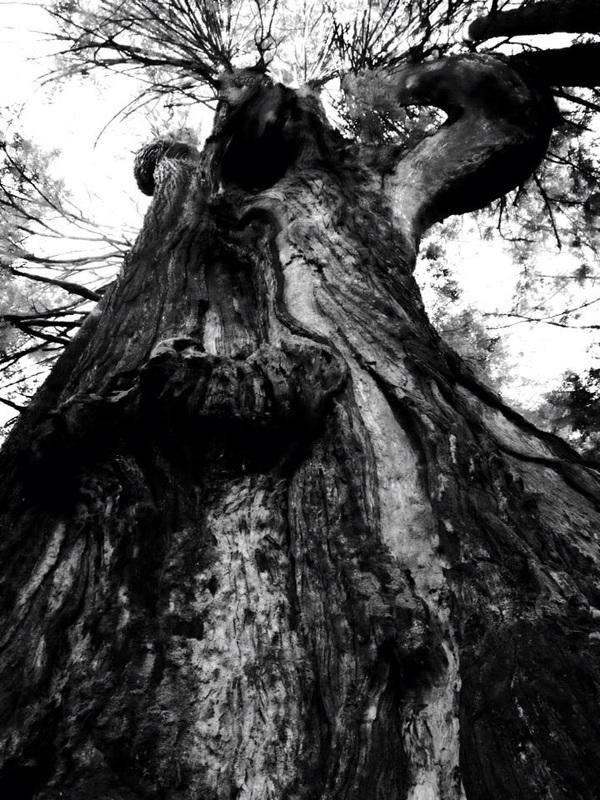
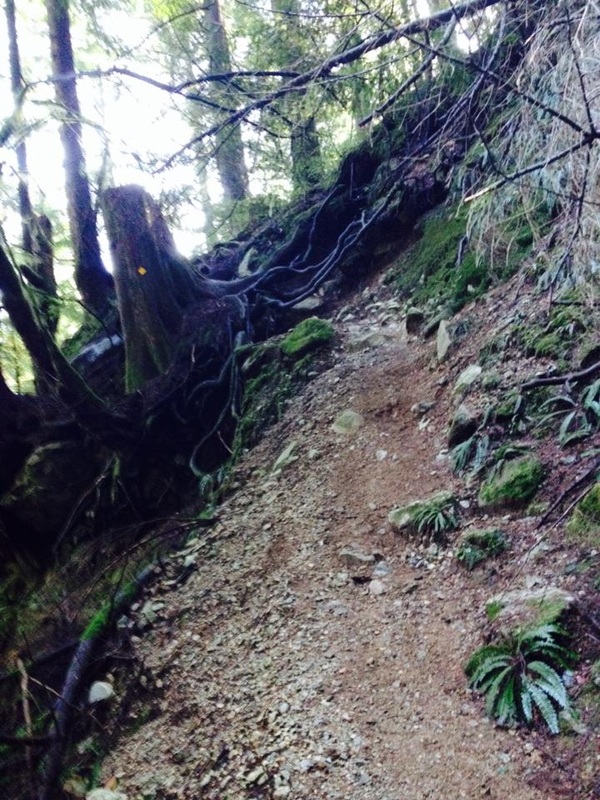
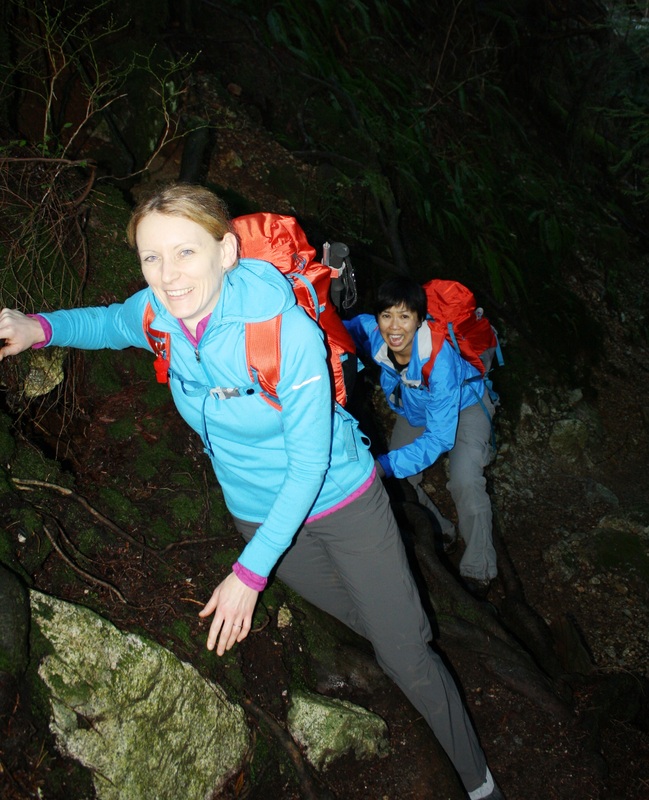
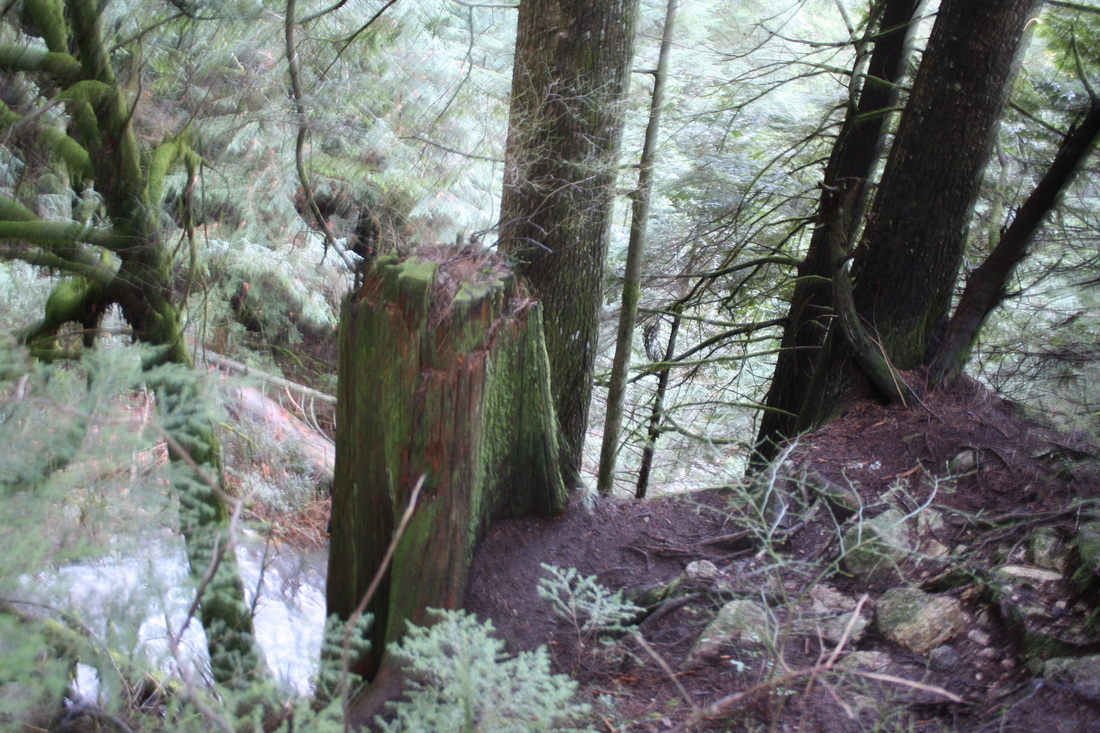
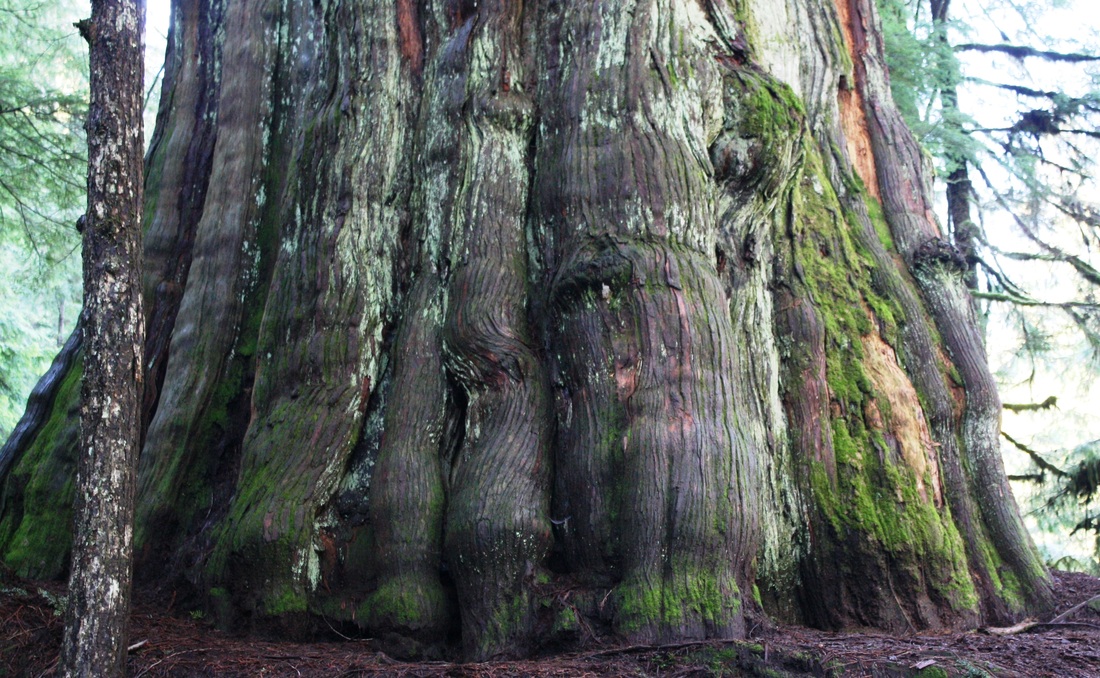
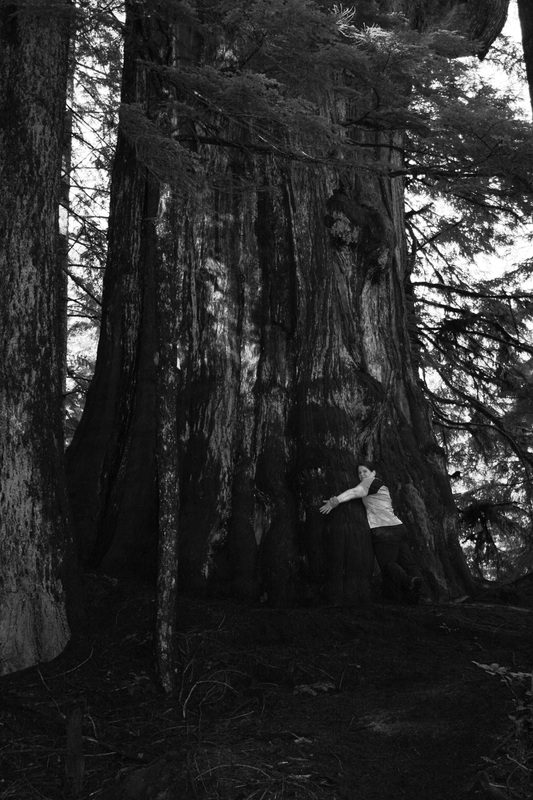
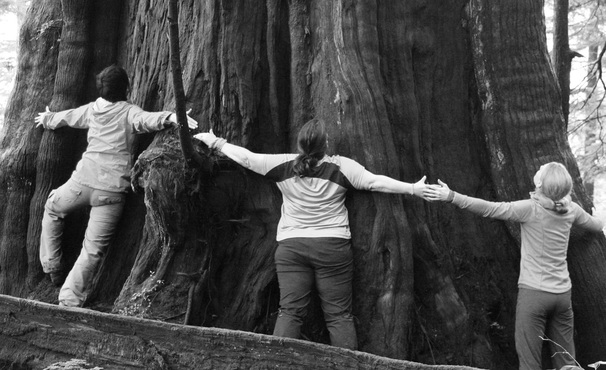 Directions: Drive to North Vancouver and take exit 21/Mountain Highway. Stay right and follow the road to Dempsey and park on Dempsey. Parking anywhere else could result in a tow. They are planning on having a parking lot May 2015 at the trail head but for now this is your only option. Trail Head: Once parked follow road up about 5 blocks and you’ll see the first of two yellow gates. Keep walking past second yellow gate by pit toilets. This is the only washroom on the trail. This trail can be very muddy, creek crossings can be full on waterfalls depending on the latest precipitation. Good waterproof hiking boots and gators are an assets on this trail. Trail Key: M~2~RY~R~V~PT~RH 2015~Keep following the wide road to trail junction, Big Cedar Trail, go right down the rocky path. Follow it along path to trail junction, Kirkford and go right. Do not go up Kirkford. It doesn’t look like a trail but it is. It’s not marked…A few moments later you’ll cross a creek. If it has rained recently it might be a full waterfall. This trail has yellow markers in the trees but you’ll likely not see them as they are not noticeable on the way in so keep looking behind you and then you’ll know you are on the right path. The trail is also marked with pink flagging tape. There are several muddy sections and many creek crossings. The trail snakes its way here and there and soon you’ll come to a step log and right away a blow down tree. You can squeeze under or if you’re tall swing your legs over. Soon you’ll come to a steep & slippery dirt path and quite a drop off. It's a little slippery here and there are a few roots to grab onto as you make your way down. There's a couple of rope assists to help guide you as well. This is the worst part of the trail. Once at the bottom there is yet another creek crossing. A couple more downs and the first of two creek beds. The first May or may not be dry and the trail picks up on the other side slightly down the creek bed. Shortly after, you’ll come to another trail going down, another creek crossing, mud and more slippery roots. Lots of blowdown to cross over and under. A couple more ups and downs and her majesty is there in the middle of the trail to greet you, in all her glory. She is beautiful standing tall and 45 feet wide/5 meters (measured by Ron). This is the perfect spot for lunch. If you decide to go right, & down the steep switchbacks you can see Lynn Creek or go behind the cedar tree and the trail picks again and takes you to Kennedy Falls. On your way to Kennedy Falls the trail has much of what you've experienced already. It's about another hour. It's worth it to see the falls. They are amazing! Finally, you'll see the falls but keep going as the trail takes you right down beside them. On a hot summer day it would be amazing to have your lunch while listening to them roar down powerfully beside you. It is a beautiful 12 km's return trail. Expect to get wet, muddy and to have a real good time! Scaredy Cat says you won't loose any of your nine lives but be careful on the steep section and the slippery parts. Don’t forget your camera!!! Lori aka Scaredy Cat. Thanks to Karl from Outdoor Vancouver for finding this beauty! For more information check out Outdoor Vancouver's post on this trail: http://www.outdoorvancouver.ca/hiking-big-cedar-trail-kennedy-creek-falls/ 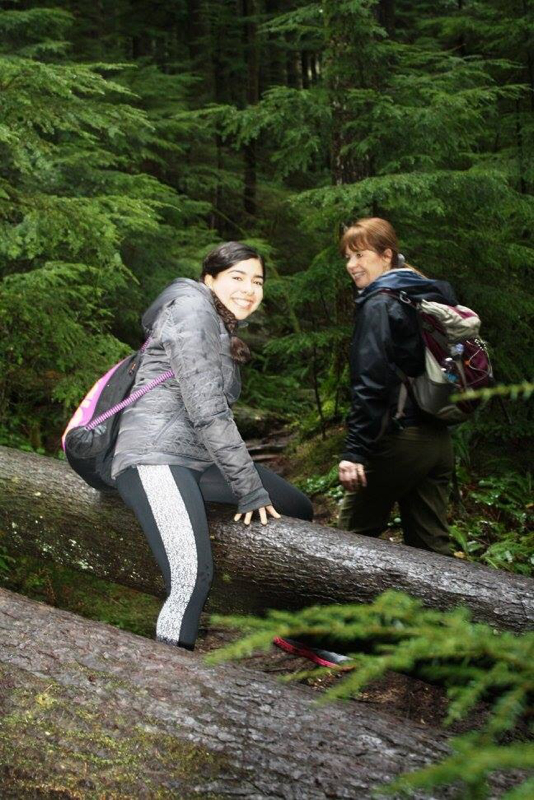 Diana's first hike, ever. She's from Mexico. She did great. Here she is crossing one of the many blowdown's. 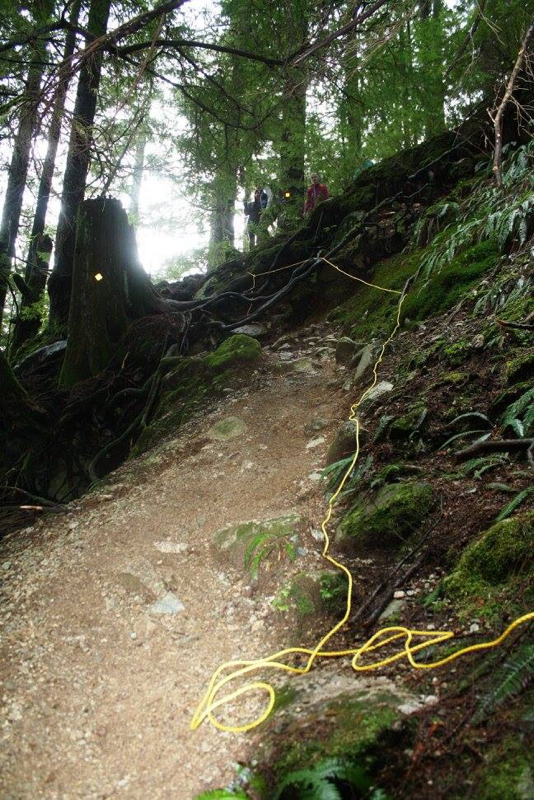 Rope assist, if you need it at the only steep section. 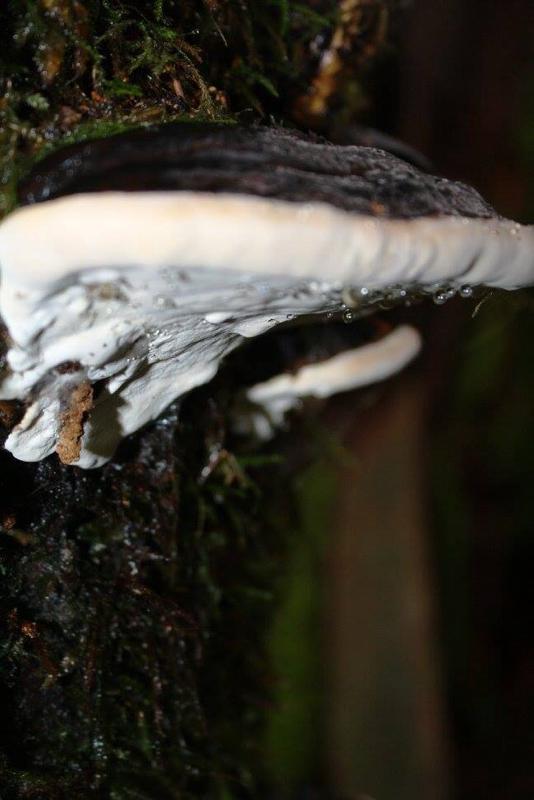 Fungi along the trail 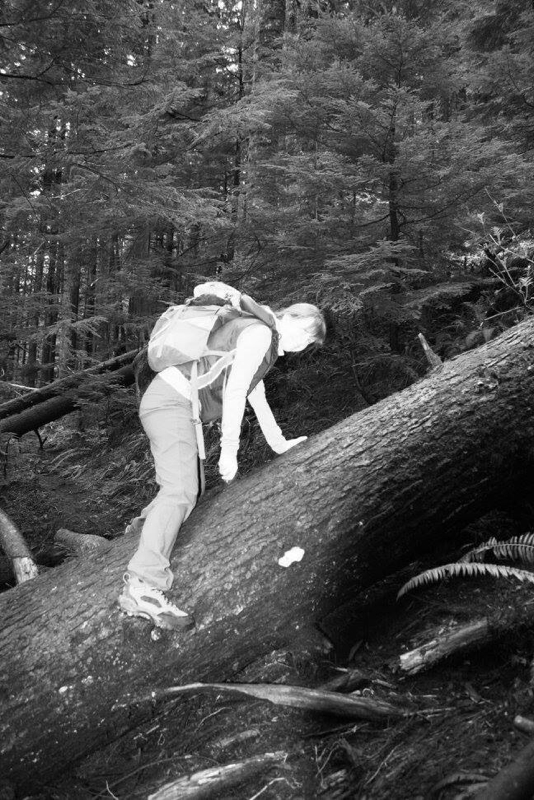 Corinne crossing the blowdown. 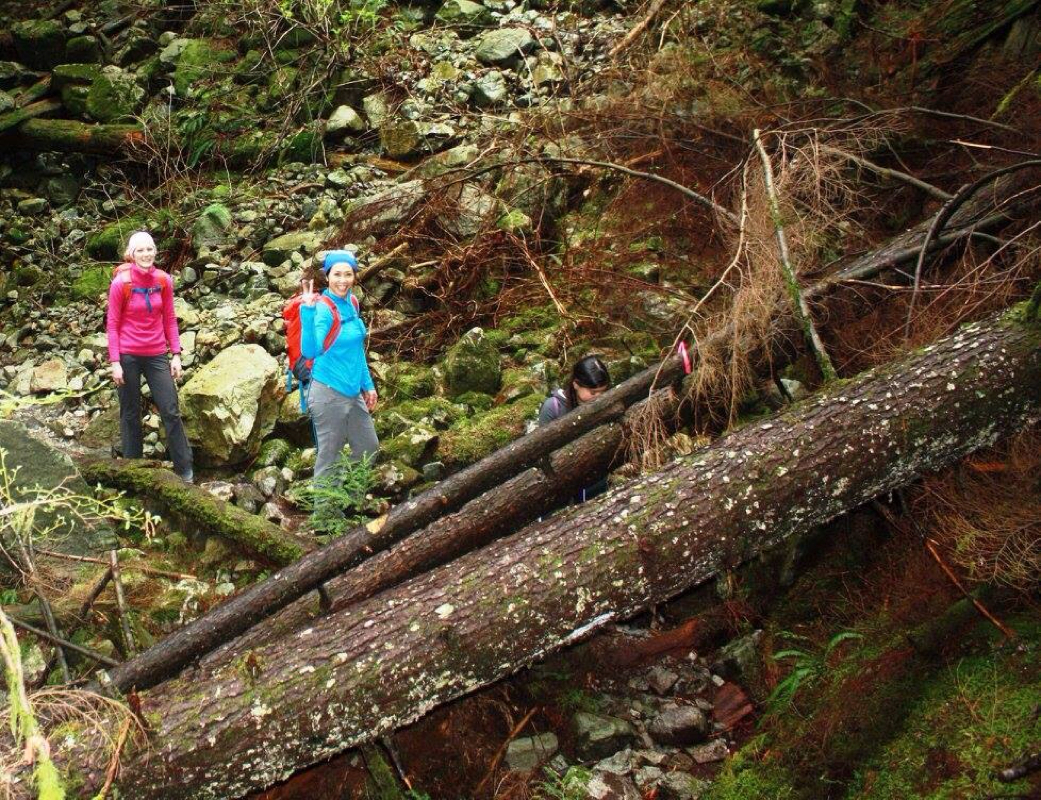 Terry & Su approaching some blowdown but still smiling. 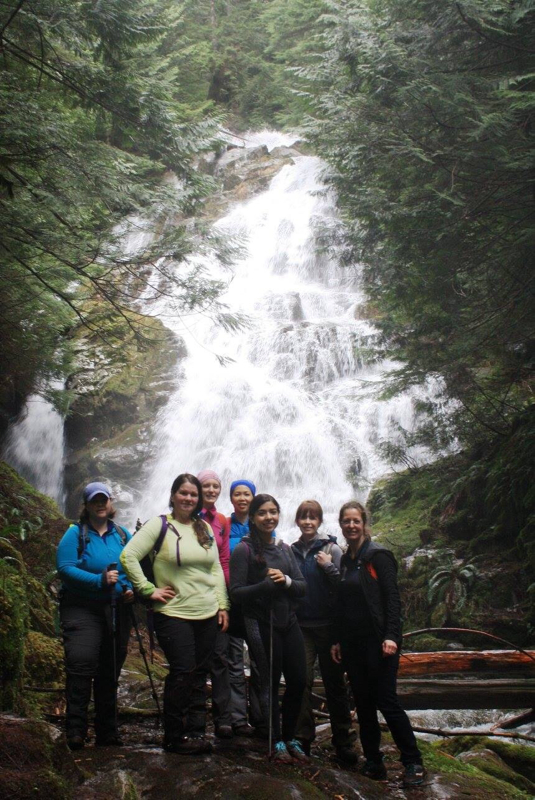 Kim, me, Su, Terry, Diana, Corinne & Wendy at Kennedy Falls. 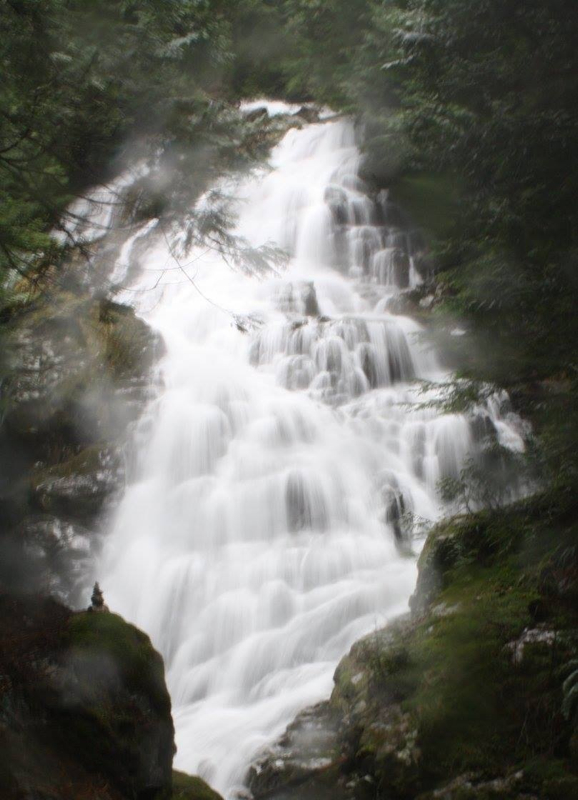 Kennedy Falls. Worth the extra hour of mud, creek crossings and blowdown. |
Author.I work for Surrey School District as an Education Assistant. In my free time I enjoy hiking, snowshoeing, going off-road, dragon boating, writing & hanging with my huskies. Archives
March 2021
Categories |


 RSS Feed